IBM Cloud Container Workshop
Docker Labs

Prerequisites
This set of instructions requires that docker is already installed and docker commands can be run from a bash shell or a command line. You can get more information at the Docker website
Note: This lab assumes that you are running on the virtual server we provided you. As IBM Cloud Private is installed on this VM, you will see many containers running.
Be careful not to delete containers, images or process unless specified
Lab1 - Working with Docker
1. Check Docker version
Connect to your server with ssh and confirm that docker is installed.
The version number isn’t particularly important. However, you can see both the client (CLI) and the server (engine).
docker version
Output:
# docker version
Client:
 Version:      18.03.1-ce
 API version:  1.37
 Go version:   go1.9.5
 Git commit:   9ee9f40
 Built:        Thu Apr 26 07:17:20 2018
 OS/Arch:      linux/amd64
 Experimental: false
 Orchestrator: swarm

Server:
 Engine:
  Version:      18.03.1-ce
  API version:  1.37 (minimum version 1.12)
  Go version:   go1.9.5
  Git commit:   9ee9f40
  Built:        Thu Apr 26 07:15:30 2018
  OS/Arch:      linux/amd64
  Experimental: false
If you receive an error then go back to the PrepareLab.md document to install Docker on your system.
2. Run your first container
As with all new computer things, it is obligatory that we start with “hello-world”
docker run hello-world
Output:
> docker run hello-world
Unable to find image 'hello-world:latest' locally
latest: Pulling from library/hello-world
1b930d010525: Pull complete
Digest: sha256:2557e3c07ed1e38f26e389462d03ed943586f744621577a99efb77324b0fe535
Status: Downloaded newer image for hello-world:latest

Hello from Docker!
This message shows that your installation appears to be working correctly.

To generate this message, Docker took the following steps:
 1. The Docker client contacted the Docker daemon.
 2. The Docker daemon pulled the "hello-world" image from the Docker Hub.
    (amd64)
 3. The Docker daemon created a new container from that image which runs the
    executable that produces the output you are currently reading.
 4. The Docker daemon streamed that output to the Docker client, which sent it
    to your terminal.

To try something more ambitious, you can run an Ubuntu container with:
 $ docker run -it ubuntu bash

Share images, automate workflows, and more with a free Docker ID:
 https://hub.docker.com/

For more examples and ideas, visit:
 https://docs.docker.com/get-started/
Notice the message
Unable to find image 'hello-world:latest' locallyFirst you see that the image was automatically downloaded without any additional commands. Second the version:latestwas added to the name of the image. We did not specify a version for this image.
3. Rerun “hello-world”
Notice that the image is not pulled down again. It already exists locally, so it is run.
docker run hello-world
Output:
> docker run hello-world

Hello from Docker!
This message shows that your installation appears to be working correctly.

To generate this message, Docker took the following steps:
 1. The Docker client contacted the Docker daemon.
 2. The Docker daemon pulled the "hello-world" image from the Docker Hub.
    (amd64)
 3. The Docker daemon created a new container from that image which runs the
    executable that produces the output you are currently reading.
 4. The Docker daemon streamed that output to the Docker client, which sent it
    to your terminal.

To try something more ambitious, you can run an Ubuntu container with:
 $ docker run -it ubuntu bash

Share images, automate workflows, and more with a free Docker ID:
 https://hub.docker.com/

For more examples and ideas, visit:
 https://docs.docker.com/get-started/
4. Show the image
List all the images:
docker images hello-world
Output:
docker images
REPOSITORY          TAG                 IMAGE ID            CREATED             SIZE
hello-world         latest              fce289e99eb9        3 weeks ago         1.84kB
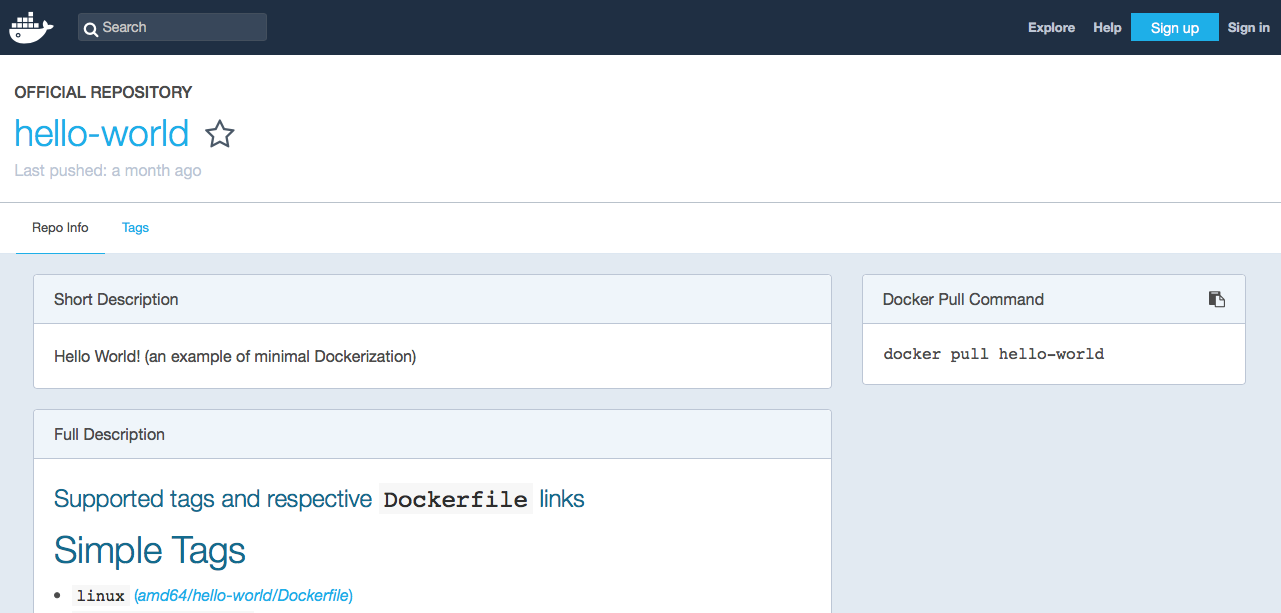
5. From where was the hello-world image pulled?
Go to https://hub.docker.com/_/hello-world/ and you can read about this image. Docker-hub is a registry that holds docker images for use. Docker-hub is not the only registry, IBM Cloud Public can serve as a docker registry. You can also have (or define) private registries.
6. Run a new container
This image is a typical image to get started with Docker. When an image is run it usually continues to run.
The running image is called a container. Let us run a more typical image; This image contains the noSQL database couchDB. As there is no image containing couchDB on your laptop, you will first pull it from the Docker Hub and then once all the layers have been downloaded and extracted, you will run it.
docker run -d couchdb
Output:
docker run -d couchdb
Unable to find image 'couchdb:latest' locally
latest: Pulling from library/couchdb
5e6ec7f28fb7: Downloading [===========================>                       ]  12.17MB/22.5MB
70113ec2139e: Download complete
80648cf0a24a: Download complete
e0794329addc: Download complete
6d60e1d083fc: Download complete
708127226509: Download complete
4eddfd85791c: Downloading [==========>                                        ]  11.24MB/54.15MB
90beac1647b7: Download complete
838fd0abf15f: Download complete
c7df822199b0: Download complete
ca2c2d17695c: Download complete
dbb7188da17c: Download complete
The output above was captured while the image was still downloading from docker-hub. When the download is complete, you don’t see anything from the container, like with hello-world. Instead you see a long hex id like 272d409a806c485cfe83727f895093ee2fcd586a6cf98455e6216c9fc95af24d. This is the long id of the container.
Digest: sha256:7f3e6372ff8a87f1a11c63a787ec7dceda85a8fe80005d6c5bbdfa6a6bcde73e
Status: Downloaded newer image for couchdb:latest
272d409a806c485cfe83727f895093ee2fcd586a6cf98455e6216c9fc95af24d
Also notice that the -d in the run command with launch the container as detached and so you can get the prompt and the command has been completed.
7. Here’s how you would see the running container.
Notice only the first part of that long hex id is displayed. Typically this is more than enough to uniquely identify that container. docker ps provides information about when the container was created, how long it has been running, then name of the image as well as the name of the container. Note that each container must have a unique name. You can specify a name for each container as long as it is unique.
docker ps | grep couchdb
Output:
# docker ps | grep couchdb
CONTAINER ID        IMAGE               COMMAND                  CREATED             STATUS              PORTS                          NAMES
272d409a806c        couchdb             "tini -- /docker-ent…"   3 minutes ago       Up 3 minutes        4369/tcp, 5984/tcp, 9100/tcp   xenodochial_heisenberg
You will notice that the name is auto-generated by Docker: xenodochial_heisenberg. So to avoid this, a good practice is to always give a name to a container with the –name parameter.
8. An image can be run multiple times
Launch another container for the couchdb image.
docker run -d couchdb
Output:
# docker run -d couchdb
fd511f9cd8965395bfcb652d6a10b5eec5c0b4479950064d7e238420c8099a6b
Did you notice how quickly the second instance started? There was no need to download the image this time. The id of the container is show after is has started. You can notice that we are reusing all the layers already downloaded when we first pull the image.
9. Two couchDB containers
docker ps | grep couchdb
Outpout:
# docker ps | grep couchdb
CONTAINER ID        IMAGE               COMMAND                  CREATED             STATUS              PORTS                          NAMES
fd511f9cd896        couchdb             "tini -- /docker-ent…"   4 minutes ago       Up 4 minutes        4369/tcp, 5984/tcp, 9100/tcp   cocky_jones
272d409a806c        couchdb             "tini -- /docker-ent…"   13 minutes ago      Up 13 minutes       4369/tcp, 5984/tcp, 9100/tcp   xenodochial_heisenberg
10. Similar couchDB instances
The containers look similar, but they have unique names and unique ids.
Stop the most recent couch_db container and then check to see what’s running.
docker stop fd511f9cd896
Output:
> docker stop fd511f9cd896
fd511f9cd896
Then check the container list:
docker ps | grep couchdb
Output:
# docker ps | grep couchdb
CONTAINER ID        IMAGE               COMMAND                  CREATED             STATUS              PORTS                          NAMES
272d409a806c        couchdb             "tini -- /docker-ent…"   19 minutes ago      Up 19 minutes       4369/tcp, 5984/tcp, 9100/tcp   xenodochial_heisenberg
So we still have one running container.
11. Stop the other container
Stop the other container and see what is running.
docker stop 272d409a806c
docker ps | grep couchdb
Output:
docker ps | grep couchdb
CONTAINER ID        IMAGE               COMMAND             CREATED             STATUS              PORTS               NAMES
We have no more couchDB running constainer.
12. What about the images
Notice that the images still exist.
docker images | grep couchdb
Output:
> docker images | grep couchdb
REPOSITORY          TAG                 IMAGE ID            CREATED             SIZE
couchdb             latest              3bfb066ff4c5        19 hours ago        205MB
You can filter the images by they names :
docker images couchdb
13. Now remove the couchDB image
Go ahead and delete the couchDB image and double check that it is gone.
docker rmi couchdb
Output:
> docker rmi couchdb
Error response from daemon: conflict: unable to remove repository reference "couchdb" (must force) - container 272d409a806c is using its referenced image 3bfb066ff4c5
Apparently some stopped containers are still using this images and you can see the ids.
14. Oops, it is not working
We can’t delete that image until we delete the “couchdb” containers.
Note the
docker ps -awill show us all the containers, not just the ones that are running but also the ones that stopped. You will noticed that all containers that you are listing have been stopped.
docker ps -a | grep couchdb
Output:
> docker ps -a | grep couchdb
fd511f9cd896        couchdb             "tini -- /docker-ent…"   21 minutes ago      Exited (0) 11 minutes ago                       cocky_jones
272d409a806c        couchdb             "tini -- /docker-ent…"   29 minutes ago      Exited (0) 7 minutes ago                        xenodochial_heisenberg
15. How to remove the image
Delete the stopped couchdb containers, delete the couchdb image, and make sure it is gone. You can leave hello-world.
docker rm fd511f9cd896 272d409a806c
Output:
> docker rm fd511f9cd896 272d409a806c
fd511f9cd896
272d409a806c
And use the rmi subcommand to remove the image:
docker rmi couchdb
Output:
docker rmi couchdb
Untagged: couchdb:latest
Untagged: couchdb@sha256:7f3e6372ff8a87f1a11c63a787ec7dceda85a8fe80005d6c5bbdfa6a6bcde73e
Deleted: sha256:3bfb066ff4c595317efd3dc672a98b3defce21427947ecb9288ffec6c7040c2b
Deleted: sha256:24efa375156ab1fe149fd095d21323680c4530f0f64989969d7997d0a32cebc2
Deleted: sha256:50840db451c21948e918cf3c2db0a89c4ed76f729a8cac419d1e0d745e739fda
Deleted: sha256:c272e617d5eed77d55fd7073a4c4200d50bf18ea5e35243cbc0ec7745912d065
Deleted: sha256:f74e6db8d559ada1ff9b71c757b241e429fbc150a8a3f7e007900846ff10c248
Deleted: sha256:0b9811c169c2edddf0e191a8da18786c781aa24d3ca4d4462fe5dbf345a5f656
Deleted: sha256:59cd6ba3a99fdece33f78b17ae7d908f684613d6be1a5429dc4290741f578269
Deleted: sha256:c474aa358b6a6d72574df65d49cc69fec3dd49679c462d0a3d0fc97c4c047b6e
Deleted: sha256:50f770ebecbd64387b54a687174e0c49097ca322b273d210ebea2635ce617552
Deleted: sha256:364bb10db37ea4450918268f69022d61d2fc650c4866b8c5847da29c6602e8ba
Deleted: sha256:a73e1b77a9ebbb952dc8a70fea3a3acfec7a87169ca8ce2f8255c9705994e8d1
Deleted: sha256:b7d374e01be227502917dab0d981f6018e29519f966bc94d7e70fd5f89850aa5
Deleted: sha256:3c816b4ead84066ec2cadec2b943993aaacc3fe35fcd77ada3d09dc4f3937313
Notice that all the layers in the image have been gone.
docker ps -a | grep couchdb
Note: Docker images and containers can be referenced by name or by id.
An alternative to these commands is to use a combined command like the following one :
docker rm -v $(docker ps -a -q)However be carefull with that command that will remove all containers.
Lab 2: Building Docker Images
A Dockerfile is a text file that has a series of instructions on how to build your image. It supports a simple set of commands that you need to use in your Dockerfile. There are several commands supported like FROM, CMD, ENTRYPOINT, VOLUME, ENV and more. We shall look at some of them.
Let us first start with the the overall flow, which goes something like this:
- You create a Dockerfile with the required instructions.
- Then you will use the docker build command to create a Docker image based on the Dockerfile that you created in step 1.
With this information, let us get going.
1. Our First Dockerfile
First let’s create a directory:
mkdir images
cd images
nano Dockerfileor notepad Dockerfile
Now type the following 2 lines:
FROM busybox:latest
MAINTAINER yourname
Replace yourname with your name.
Since, a Docker image is nothing but a series of layers built on top of each other, we start with a base image. The FROM command sets the base image for the rest of the instructions. The MAINTAINER command tells who is the author of the generated images. This is a good practice. You could have taken any other base image in the FROM instruction too, for e.g. ubuntu:latest or ubunt:14.04, etc.
Busybox is just the set of most of the shell commands. A very light subset of Linux. Busybox as an image has not been pulled yet.
Now, save the file and come back to the prompt (ctrl O, enter, ctrl X) for nano.
Execute the following in the /images folder as shown below (don’t forget the dot at the end):
docker build -t myimage:latest .
Result:
> docker build -t myimage:latest .
Sending build context to Docker daemon  2.048kB
Step 1/2 : FROM busybox:latest
latest: Pulling from library/busybox
57c14dd66db0: Pull complete
Digest: sha256:7964ad52e396a6e045c39b5a44438424ac52e12e4d5a25d94895f2058cb863a0
Status: Downloaded newer image for busybox:latest
 ---> 3a093384ac30
Step 2/2 : MAINTAINER yourname
 ---> Running in 97df43af5cdb
Removing intermediate container 97df43af5cdb
 ---> e50f1efaafdc
Successfully built e50f1efaafdc
Successfully tagged myimage:latest
This command is used to build a Docker image. The parameters that we have passed are:
- -t is the Docker image tag. You can give a name to your image and a tag.
- The second parameter (a ‘.’) specifies the location of the Dockerfile that we created. Since we created the Dockerfile in the same folder in which we are running the docker build, we specified the current directory.
Notice the various steps that the build process goes through to build out your image.
If you run a docker images command now, you will see the myimage image listed in the output as shown below:
docker images | grep latest
> docker images  | grep latest
REPOSITORY          TAG                 IMAGE ID            CREATED             SIZE
myimage             latest              e50f1efaafdc        4 minutes ago       1.2MB
hello-world         latest              fce289e99eb9        3 weeks ago         1.84kB
busybox             latest              3a093384ac30        3 weeks ago         1.2MB
You can notice that we have pulled busybox image and created myimage ! The images are very tiny.
Note : On the virtual server, you will see images used by IBM Cloud Private. You can ignore at this step other images.
You can now launch a container, any time via the standard docker run command:
docker run -it myimage
> docker run -it myimage
/ # ls
bin   dev   etc   home  proc  root  sys   tmp   usr   var
/ # ps
PID   USER     TIME  COMMAND
    1 root      0:00 sh
    8 root      0:00 ps
/ # exit
We are entering into the myimage shell (-it parameter). And you can use any shell commands like ls or ps inside the container. Type exit to come back to the standard shell.
nano Dockerfileor notepad Dockerfile
FROM busybox:latest
MAINTAINER yourname
CMD ["date"]
Then build and run the myimage container:
docker build -t myimage:latest .
docker run -it myimage
> docker run -it myimage
Mon Apr 16 12:44:10 UTC 2018
The CMD instruction takes various forms and when it is used individually in the file without the ENTRYPOINT command (which we will see in a while), it takes the following format:
CMD ["executable","param1","param2"]
So in our case, we provided the date command as the executable and when we ran a container based on the myimage now, it printed out the data.
In fact, while launching the container, you can override the default CMD by providing it at the command line as shown below. In this example, we are saying to launch the shell , thereby overriding the default CMD instruction for the Docker Image. Notice that it will lead us into the shell.
Change your Dockerfile to the following:
FROM busybox
MAINTAINER myname
ENTRYPOINT ["/bin/cat"]
CMD ["/etc/passwd"]
Save, Build and re-rerun myimage.
docker build -t myimage:latest .
docker run -it myimage
root:[images]: docker run -it myimage
root:x:0:0:root:/root:/bin/sh
daemon:x:1:1:daemon:/usr/sbin:/bin/false
bin:x:2:2:bin:/bin:/bin/false
sys:x:3:3:sys:/dev:/bin/false
sync:x:4:100:sync:/bin:/bin/sync
mail:x:8:8:mail:/var/spool/mail:/bin/false
www-data:x:33:33:www-data:/var/www:/bin/false
operator:x:37:37:Operator:/var:/bin/false
nobody:x:65534:65534:nobody:/home:/bin/false
2. Building a web server
Now, let us look at another Dockerfile shown below:
FROM ubuntu
MAINTAINER Philippe
RUN apt-get update
RUN apt-get install -y nginx
ENTRYPOINT ["/usr/sbin/nginx","-g","daemon off;"]
EXPOSE 80
Here, what we are building is an image that will run the nginx proxy server for us. Look at the set of instructions and it should be pretty clear. After the standard FROM and MAINTAINER instructions, we are executing a couple of RUN instructions. A RUN instruction is used to execute any commands during the build process. In this case we are running a package update and then installing nginx. The ENTRYPOINT is then running the nginx executable and we are using the EXPOSE command here to inform what port the container will be listening on. Remember in our earlier chapters, we saw that if we use the -P command, then the EXPOSE port will be used by default. However, you can always change the host port via the -p parameter as needed.
Here are the steps:
cd
mkdir webapp
cd webapp
nano Dockerfile or notepad Dockerfile
Now copy and paste the Dockerfile text (see above). Save the file.
docker build . -t myimage:latest
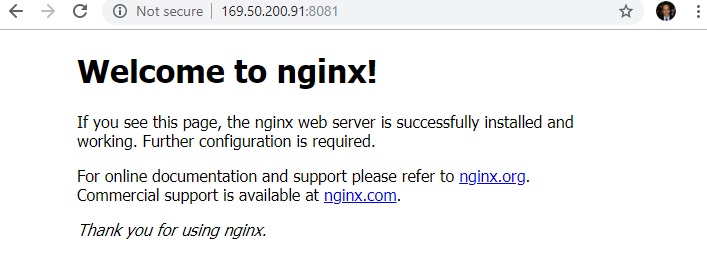
docker run -d -p 8081:80 --name webserver myimage
curl http://localhost:8081
Results :
# curl http://localhost:8081
<!DOCTYPE html>
<html>
<head>
<title>Welcome to nginx!</title>
<style>
    body {
        width: 35em;
        margin: 0 auto;
        font-family: Tahoma, Verdana, Arial, sans-serif;
    }
</style>
</head>
<body>
<h1>Welcome to nginx!</h1>
<p>If you see this page, the nginx web server is successfully installed and
working. Further configuration is required.</p>
<p>For online documentation and support please refer to
<a href="http://nginx.org/">nginx.org</a>.<br/>
Commercial support is available at
<a href="http://nginx.com/">nginx.com</a>.</p>
<p><em>Thank you for using nginx.</em></p>
</body>
</html>
Or you can also open a browser on your laptop and type :
###3. Troubleshooting containers
To troubleshoot your container or your application, you may want to go inside the container to look at some logs or to see the processes.
docker exec -it webserver "/bin/bash"
-it : this concerns the interation with the container by using a bash shell
A prompt with the container id will be returned to you : root@cc88b7536a57:/#
You can then type any kind of linux commands
Output:
> docker exec -it webserver "/bin/bash"
root@cc88b7536a57:/#
root@cc88b7536a57:/#
root@cc88b7536a57:/# ll
total 72
drwxr-xr-x   1 root root 4096 Nov 30 14:59 ./
drwxr-xr-x   1 root root 4096 Nov 30 14:59 ../
-rwxr-xr-x   1 root root    0 Nov 30 14:59 .dockerenv*
drwxr-xr-x   1 root root 4096 Nov 30 14:58 bin/
drwxr-xr-x   2 root root 4096 Apr 24  2018 boot/
drwxr-xr-x   5 root root  340 Nov 30 14:59 dev/
drwxr-xr-x   1 root root 4096 Nov 30 14:59 etc/
drwxr-xr-x   2 root root 4096 Apr 24  2018 home/
drwxr-xr-x   1 root root 4096 Nov 12 20:54 lib/
drwxr-xr-x   2 root root 4096 Nov 12 20:55 lib64/
drwxr-xr-x   2 root root 4096 Nov 12 20:54 media/
drwxr-xr-x   2 root root 4096 Nov 12 20:54 mnt/
drwxr-xr-x   2 root root 4096 Nov 12 20:54 opt/
dr-xr-xr-x 580 root root    0 Nov 30 14:59 proc/
drwx------   2 root root 4096 Nov 12 20:56 root/
drwxr-xr-x   1 root root 4096 Nov 30 14:59 run/
drwxr-xr-x   1 root root 4096 Nov 30 14:58 sbin/
drwxr-xr-x   2 root root 4096 Nov 12 20:54 srv/
dr-xr-xr-x  13 root root    0 Nov 30 14:59 sys/
drwxrwxrwt   1 root root 4096 Nov 30 14:58 tmp/
drwxr-xr-x   1 root root 4096 Nov 12 20:54 usr/
drwxr-xr-x   1 root root 4096 Nov 30 14:58 var/
root@cc88b7536a57:/# ps -ef
UID        PID  PPID  C STIME TTY          TIME CMD
root         1     0  0 14:59 ?        00:00:00 nginx: master process /usr/sbin/
www-data     7     1  0 14:59 ?        00:00:00 nginx: worker process
www-data     8     1  0 14:59 ?        00:00:00 nginx: worker process
www-data     9     1  0 14:59 ?        00:00:00 nginx: worker process
www-data    10     1  0 14:59 ?        00:00:00 nginx: worker process
www-data    11     1  0 14:59 ?        00:00:00 nginx: worker process
www-data    12     1  0 14:59 ?        00:00:00 nginx: worker process
www-data    13     1  0 14:59 ?        00:00:00 nginx: worker process
www-data    14     1  0 14:59 ?        00:00:00 nginx: worker process
root        15     0  0 15:03 pts/0    00:00:00 /bin/bash
root        27    15  0 15:03 pts/0    00:00:00 ps -ef
Don’t forget to exit from the container:
# exit
Conclusion
Congratulations, you have successfully completed this Containers lab ! You’ve just build and run your first Docker-based web app ! In this lab, you learned how to build and run images on docker on your laptop.