IBM Cloud Container Workshop
Kubernetes Lab

Introduction to IBM Cloud Kubernetes Service (IKS)
IBM Cloud Kubernetes Service combines Docker and Kubernetes to deliver powerful tools, an intuitive user experience, and built-in security and isolation to automate the deployment, operation, scaling, and monitoring of containerized apps over a cluster of independent compute hosts by using the Kubernetes APIs.
Docker containers
Docker is an open source project that was released by dotCloud in 2013. Built on features of the existing Linux container technology (LXC), Docker became a software platform that you can use to build, test, deploy, and scale apps quickly. Docker packages software into standardized units that are called containers that include all of the elements that an app needs to run.
Review these concepts to learn about basic Docker concepts.
Container
A container is a standard way to package an app and all its dependencies so that the app can be moved between environments and run without changes. Unlike virtual machines, containers do not virtualize a device, its operating system, and the underlying hardware. Only the app code, run time, system tools, libraries, and settings are packaged inside the container. Containers run as isolated processes on the compute host where they are deployed to and share the host operating system and its hardware resources. This approach makes a container more lightweight, portable, and efficient than a virtual machine.
Image
Every container is based on a Docker image and is considered to be an instance of an image. An image is built from a Dockerfile, which is a file that contains instructions how to build the image, and any build artifacts, such as an app, the app’s configuration, and its dependencies.ls -ltr
Registry
An image registry is a place where you store, retrieve, and share Docker images. Images that are stored in a registry can either be publicly available (public registry) or accessible by a small group of users only (private registry). IBM Cloud Kubernetes Service offers public images, such as ibmliberty that you can use to get started with Docker and Kubernetes to create your first containerized app in a cluster. When it comes to enterprise applications, use a private registry like the one provided in IBM Cloud to protect your images from being used and changed by unauthorized users.
When you want to deploy a container from an image, you must make sure that the image is stored in either a public or private image registry.
Kubernetes
Kubernetes was developed by Google as part of the Borg project and handed off to the open source community in 2015. Kubernetes combines more than 15 years of Google research in running a containerized infrastructure with production work loads, open source contributions, and Docker container management tools to provide an isolated and secure app platform that is portable, extensible, and self-healing in case of failovers.
Learn about the basics of how Kubernetes works with a little terminology.

Cluster
A Kubernetes cluster consists of one or more virtual machines that are called worker nodes. Every worker node represents a compute host where you can deploy, run, and manage containerized apps. Worker nodes are managed by a Kubernetes master that centrally controls and monitors all Kubernetes resources in the cluster. When you deploy a containerized app, the Kubernetes master decides where to deploy the app, taking into account the deployment requirements and available capacity in the cluster.
Pod
Every containerized app that is deployed into a Kubernetes cluster is deployed, run, and managed by a pod. Pods represent the smallest deployable units in a Kubernetes cluster and are used to group containers that must be treated as a single unit. In most cases, a container is deployed to its own pod. However, an app might require a container and other helper containers to be deployed into one pod so that those containers can be addressed by using the same private IP address.
Deployment
A deployment is a Kubernetes resource where you specify your containers and other Kubernetes resources that are required to run your app, such as persistent storage, services, or annotations. Deployments are documented in a Kubernetes deployment script. When you run a deployment, the Kubernetes master deploys the specified containers into pods taking into account the capacity that is available on the worker nodes of the cluster. Other Kubernetes resources are created and configured as specified in the deployment script.
You can use a deployment to define update strategies for your app, which includes the number of pods that you want to add during a rolling update and the number of pods that can be unavailable at a time. When you perform a rolling update, the deployment checks whether the revision is working and stops the rollout when failures are detected.
Service
A Kubernetes service groups a set of pods and provides network connection to these pods for other services in the cluster without exposing the actual private IP address of each pod. You can use a service to make your app available within your cluster or to the public internet.
With IBM Cloud Kubernetes Service (IKS), you can define complex architectures that implement resiliency, high availability and replication between data centers and regions (also called AZ – availability zones).
In this lab, we are not going to implement such a complex environment.
Task 1 : Create your first cluster
Kubernetes is an orchestration tool for scheduling app containers onto a cluster of compute machines. With Kubernetes, developers can rapidly develop highly available applications by using the power and flexibility of containers.
Before you can deploy an app by using Kubernetes, start by creating a cluster. A cluster is a set of worker nodes that are organized into a network. The purpose of the cluster is to define a set of resources, nodes, networks, and storage devices that keep applications highly available.
To create a lite cluster:
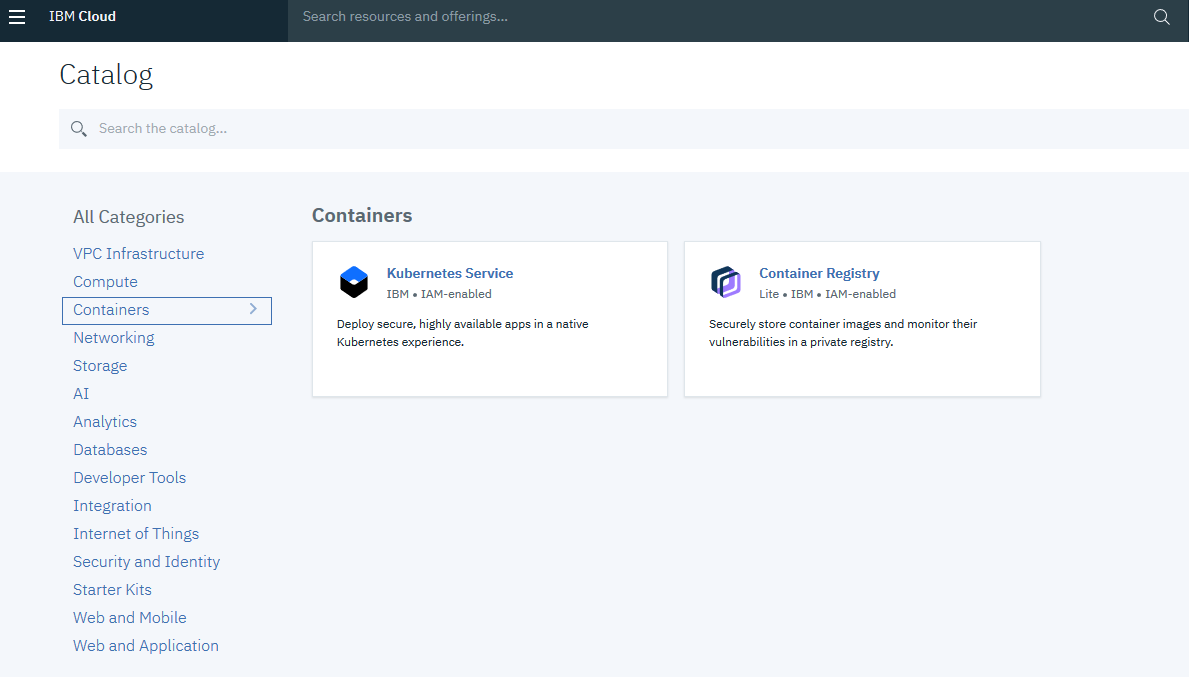
1. Select the IBM Kubernetes Service
From the Catalog, in the Containers category, click Kubernetes Service.
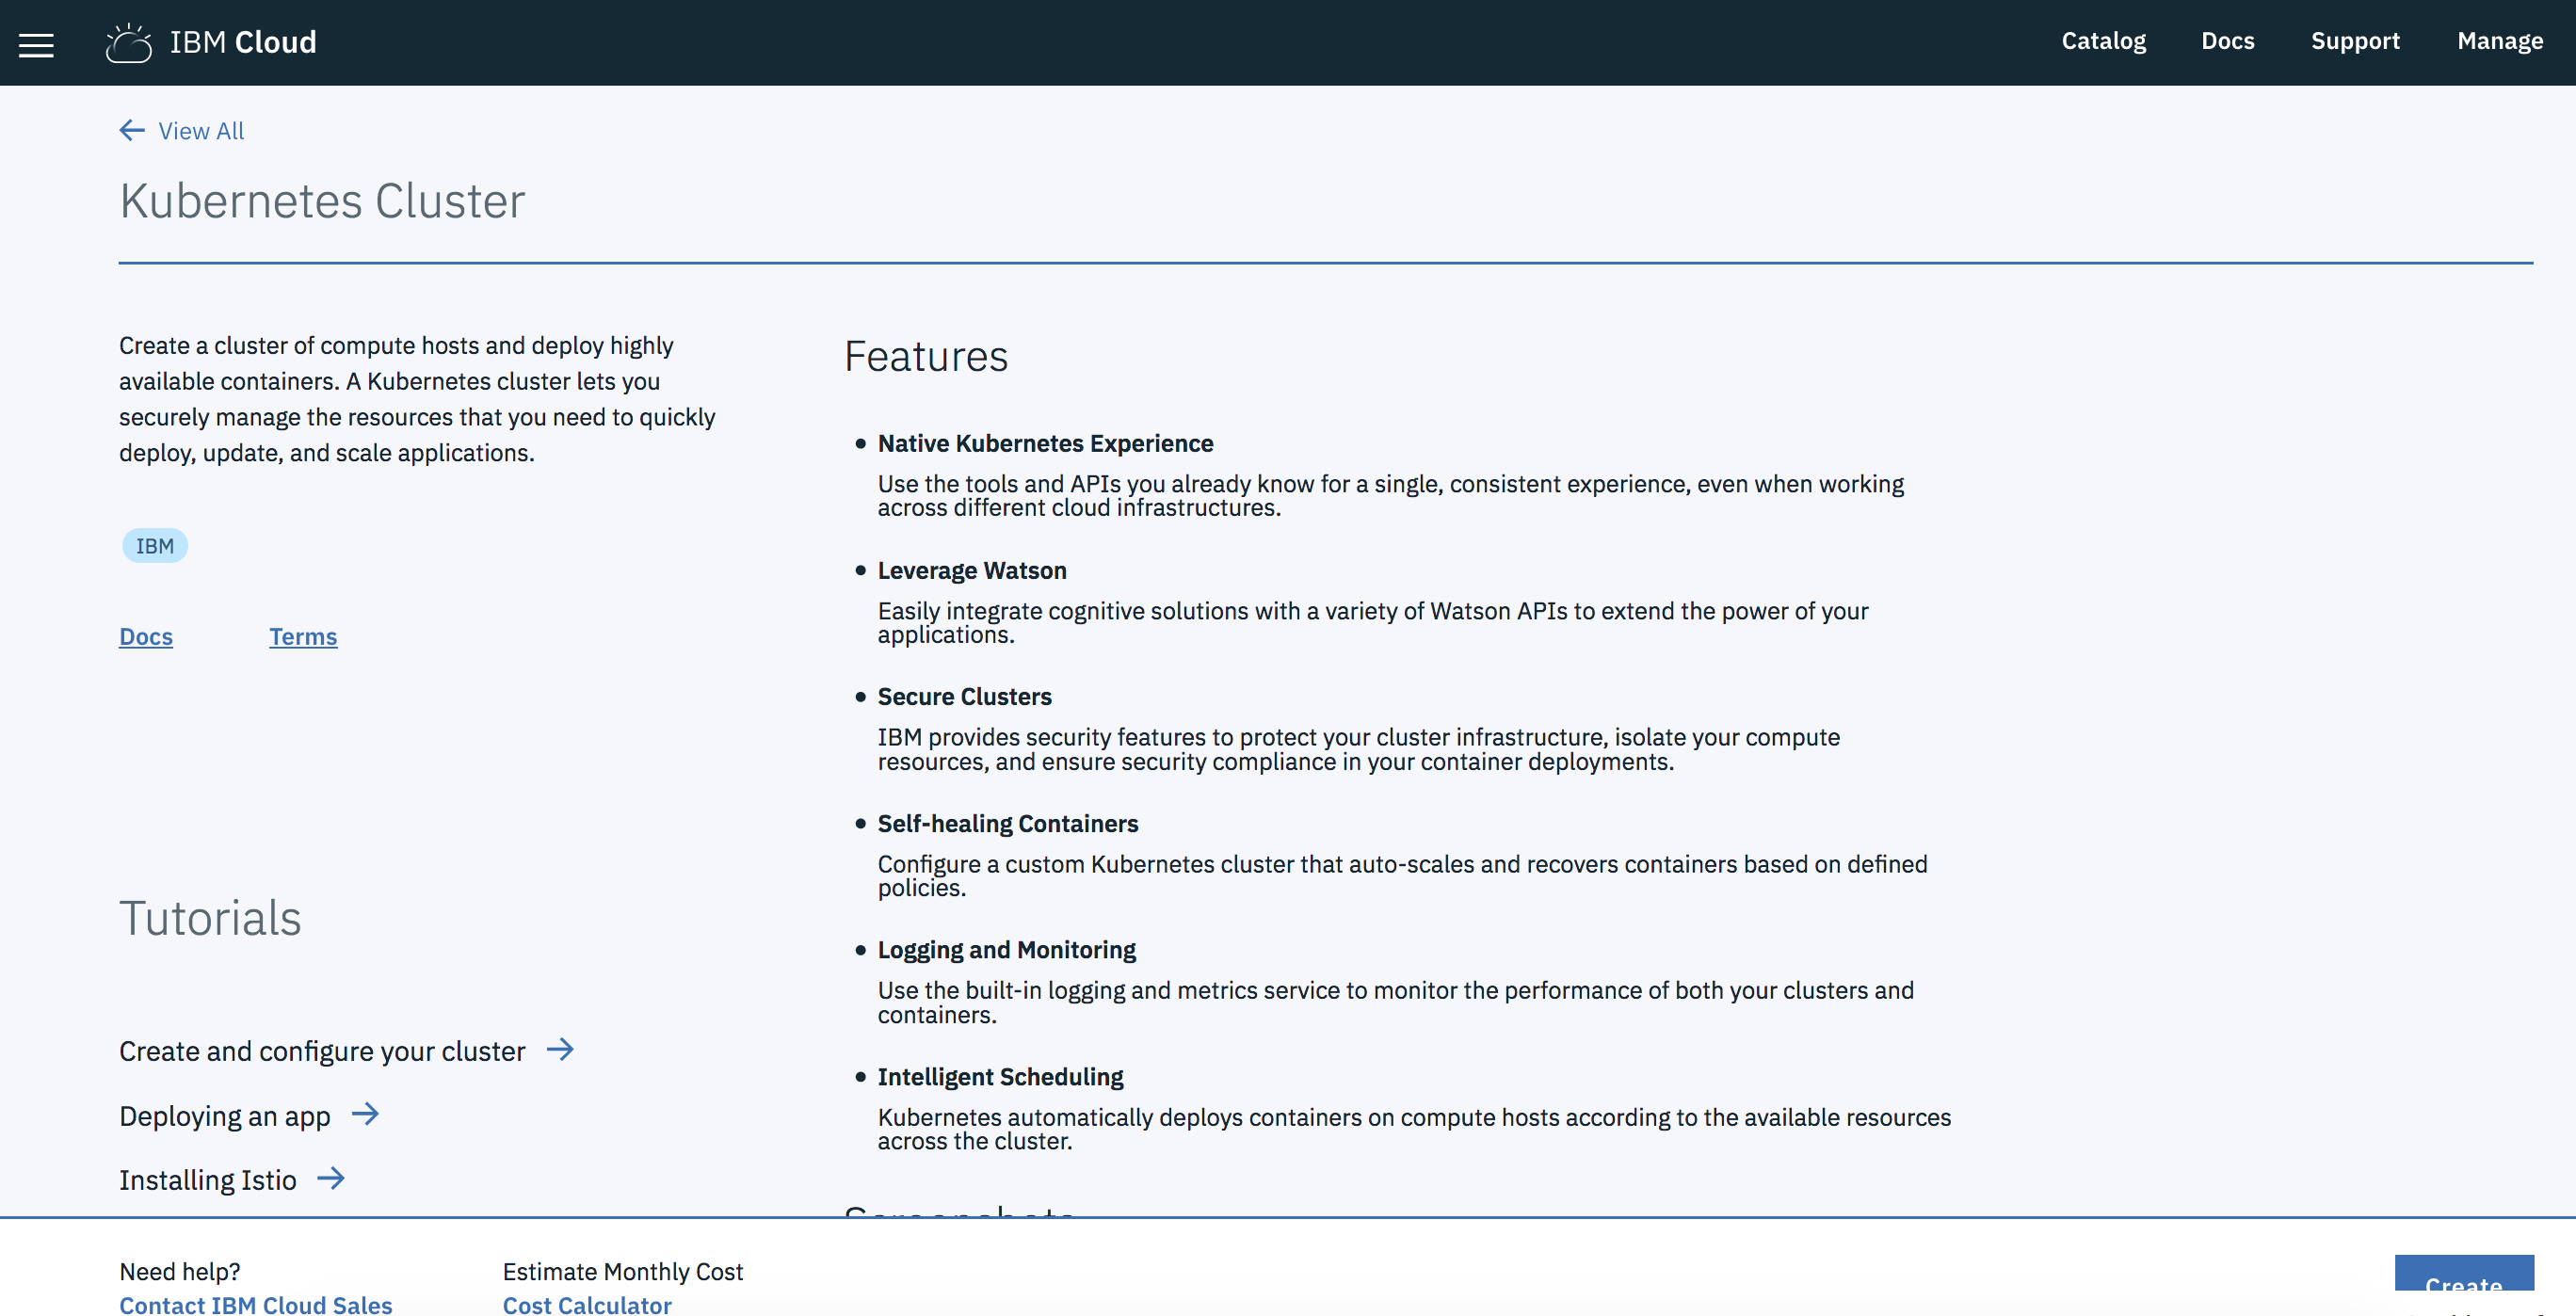
2. Create the service
To use that service, click the blue button(create) at the bottom:
3. Choose a region and a free Cluster
Select Free for the cluster type, the Default Resource group, the North America Geography and then the Dallas Metro:
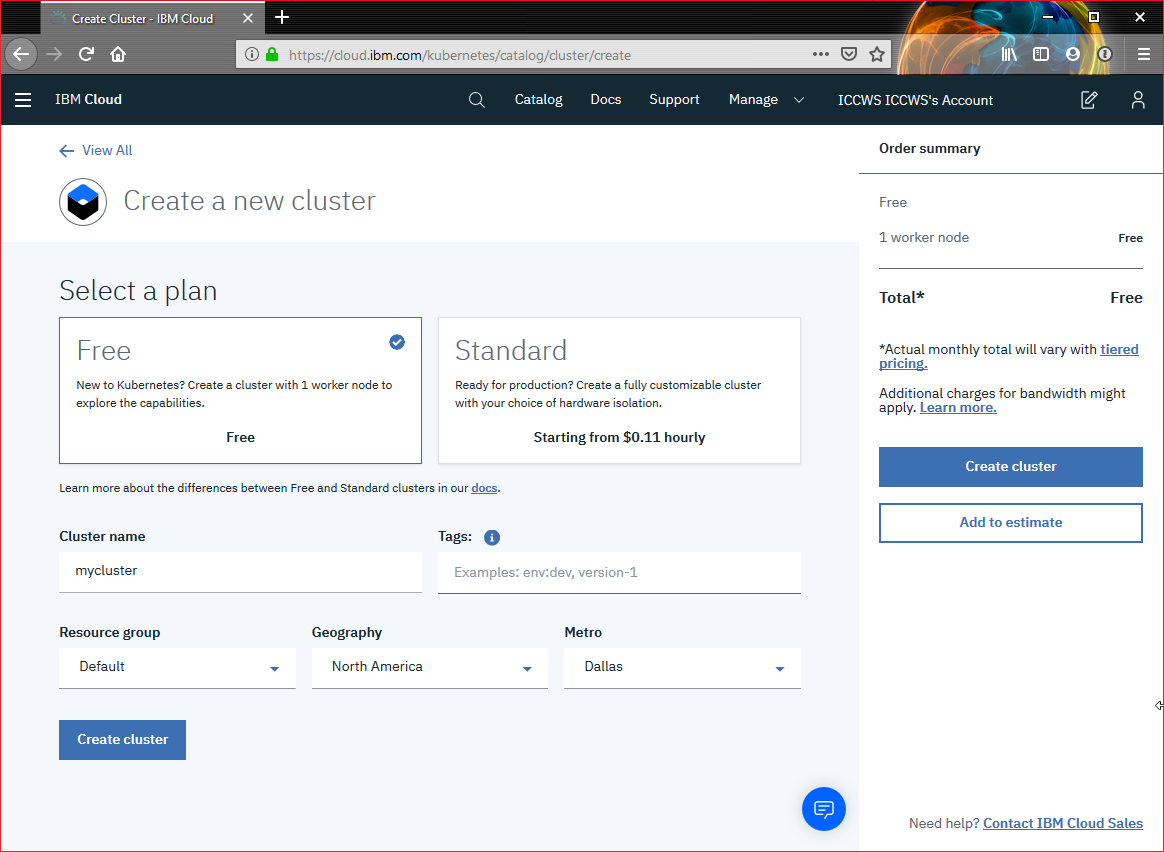
Keep mycluster as the name of your cluster
The default cluster type is free. Next time, you can create a standard cluster and define additional customizations, like how many worker nodes are in the cluster.
4. Click Create Cluster.
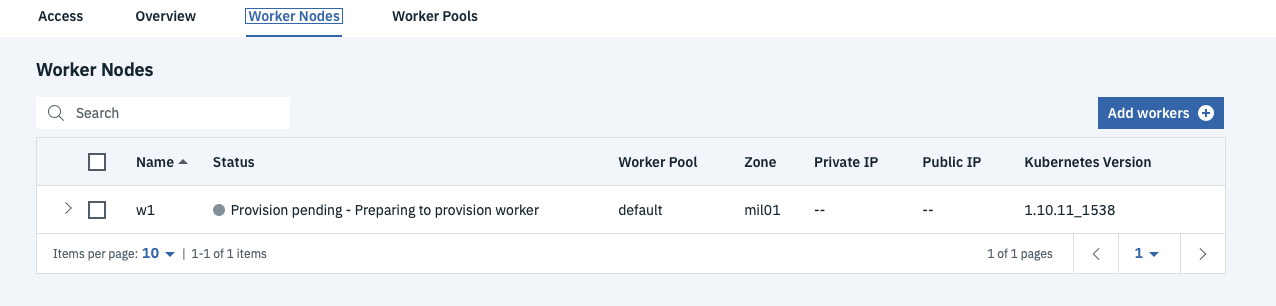
The details for the cluster open, but the worker node in the cluster takes a few minutes (around 10 minutes) to provision. You can see the status of the worker node in the Worker nodes tab. When the status reaches Ready, your worker node is ready to be used. A green light will appear.
5. What is a lite cluster
The lite cluster has one worker node with 2 CPU and 4 GB memory available for your apps to use for one month.
The worker node is centrally monitored and managed by a dedicated and highly available IBM-owned Kubernetes master that controls and monitors all of the Kubernetes resources in the cluster. You can focus on your worker node and the apps that are deployed in the worker node without worrying about managing this master too.
The resources that are required to run the cluster, such as VLANS and IP addresses, are managed in an IBM-owned IBM Cloud Infrastructure (SoftLayer) account. When you create a standard cluster, you manage these resources in your own IBM Cloud Infrastructure (SoftLayer) account. You can learn more about these resources when you create a standard cluster.
Tip: Lite clusters that are created with a IBM Cloud free trial account are automatically removed after the free trial period ends, unless you upgrade to a IBM Cloud Pay-As-You-Go account.
Task 2 : Check requirements
Deploy and manage your own Kubernetes cluster in the cloud. You can automate the deployment, operation, scaling, and monitoring of containerized apps in a cluster of independent compute hosts called worker nodes.
To set up the infrastructure: • Install all the CLIs for using the Kubernetes API and managing Docker images • Create a private image repository in IBM Cloud Container Registry to store your images
It can take 10min utes to provision your cluster. To make the most of your time, create your cluster before installing all the CLIs.
1. Check that docker is running on the VM
docker version
2. Check that ibmcloud ks (K8S service) and ibmcloud cr (container registry) have been installed
ibmcloud plugin list
Results:
# ibmcloud plugin list
Listing installed plug-ins...

Plugin Name                            Version   Status
cloud-functions/wsk/functions/fn       1.0.32
cloud-object-storage                   1.0.0
container-registry                     0.1.391
container-service/kubernetes-service   0.3.49
dev                                    2.2.0
sdk-gen                                0.1.12
3. Check kubectl command line
kubectl is the command that controls Kubernetes objects and resources. This is just one exec file that you must put in the right library on your computer.
For complete functional compatibility, download the Kubernetes CLI version that matches the Kubernetes cluster version you plan to use.
Type the following command :
kubectl version --short
And you should get version for your client :
$ kubectl version --short
Client Version: v1.9.8
error: You must be logged in to the server (the server has asked for the client to provide credentials)
The error at the end is normal because we need to specify how to connect to the master (see below).
5. Gain access to the cluster
Log into your IBM Cloud account if no already logged in.
ibmcloud login -r us-south
don’t forget to
ibmcloud target -o ORG -s SPACEwhere ORG is your email and SPACE is dev. Or useibmcloud target --cfinstead.
IMPORTANT : At this point, your cluster should have been started. Check in the IBM Cloud Console.
Then go to your Cluster Region :
ibmcloud ks region-set us-south
Set correct containers API endpoint :
ibmcloud ks api https://containers.cloud.ibm.com
To list all your cluster :
ibmcloud ks clusters
Set the context for the cluster in your CLI.
ibmcloud ks cluster-config mycluster
Output:
# ibmcloud ks cluster-config --cluster mycluster
OK
The configuration for mycluster was downloaded successfully.

Export environment variables to start using Kubernetes.

export KUBECONFIG=/root/.bluemix/plugins/container-service/clusters/mycluster/kube-config-mil01-mycluster.yml
IMPORTANT : Set the KUBECONFIG environment variable. Copy the output from the previous command and paste it in your terminal. The command output should look similar to the following.
export KUBECONFIG=/root/.bluemix/plugins/container-service/clusters/mycluster/kube-config-mil01-mycluster.yml
Verify that you can connect to your cluster by listing your worker nodes.
kubectl get nodes
The output should be :
# kubectl get nodes
NAME             STATUS   ROLES    AGE   VERSION
10.144.194.179   Ready    <none>   21m   v1.13.7+IKS
YOU ARE NOW CONNECTED TO YOUR CLUSTER !
Task 3 : Creating a private registry
Set up your own private image repository in IBM Cloud Container Registry to securely store and share Docker images with all cluster users. A private image repository in IBM Cloud is identified by a namespace. The namespace is used to create a unique URL to your image repository that developers can use to access private Docker images.
We choose a unique name as our namespace to group all images in our account. Replace
ibmcloud cr namespace-add <my_namespace>
Results:
$ ibmcloud cr namespace-add imgreg
Adding namespace 'imgreg'...
Successfully added namespace 'imgreg'
OK
Now login to the IBM Cloud registry:
ibmcloud cr login
Output:
# ibmcloud cr login
Logging in to 'registry.ng.bluemix.net'...
Logged in to 'registry.ng.bluemix.net'.

IBM Cloud Container Registry is adopting new icr.io domain names to align with the rebranding of IBM Cloud for a better user experience. The existing bluemix.net domain names are deprecated, but you can continue to use them for the time being, as an unsupported date will be announced later. For more information about registry domain names, see https://cloud.ibm.com/docs/services/Registry?topic=registry-registry_overview#registry_regions_local

Logging in to 'us.icr.io'...
Logged in to 'us.icr.io'.

IBM Cloud Container Registry is adopting new icr.io domain names to align with the rebranding of IBM Cloud for a better user experience. The existing bluemix.net domain names are deprecated, but you can continue to use them for the time being, as an unsupported date will be announced later. For more information about registry domain names, see https://cloud.ibm.com/docs/services/Registry?topic=registry-registry_overview#registry_regions_local

OK
IBM Cloud Container Registry is adopting new icr.io domain names to align with the rebranding of IBM Cloud for a better user experience. The existing bluemix.net domain names are deprecated, but you can continue to use them for the time being, as an unsupported date will be announced later. For more information about registry domain names, see https://cloud.ibm.com/docs/services/Registry?topic=registry-registry_overview#registry_regions_local
To test our new private registry, do the following steps:
- get the hello-world image from Docker-Hub
docker pull hello-world
- tag the hello-world image with a name containing your private registry name :
docker tag hello-world us.icr.io/<my_namespace>/hello-world:latest
- push your image in the private registry
docker push us.icr.io/<my_namespace>/hello-world:latest
- List the images in the private registry
ibmcloud cr image-list
# ibmcloud cr image-list
Listing images...

REPOSITORY                       TAG      DIGEST         NAMESPACE   CREATED        SIZE    SECURITY STATUS
us.icr.io/tufihreg/hello-world   latest   92c7f9c92844   tufihreg    5 months ago   977 B   Unsupported OS

OK
Task 4 : Deploying Apps with Kubernetes
1. Check connection to your cluster
Also test your connectivity to the cluster with this command:
kubectl get nodes
If you get an error message like “error: You must be logged in to the server (Unauthorized)”, then you must setup your KUBECONFIG (see a previous topic)
2. Download a GIT repo for this exercise
Create a directory on your computer and move to that directory.
cd
mkdir iksgs
cd iksgs
Get and download this github repository into that directory :
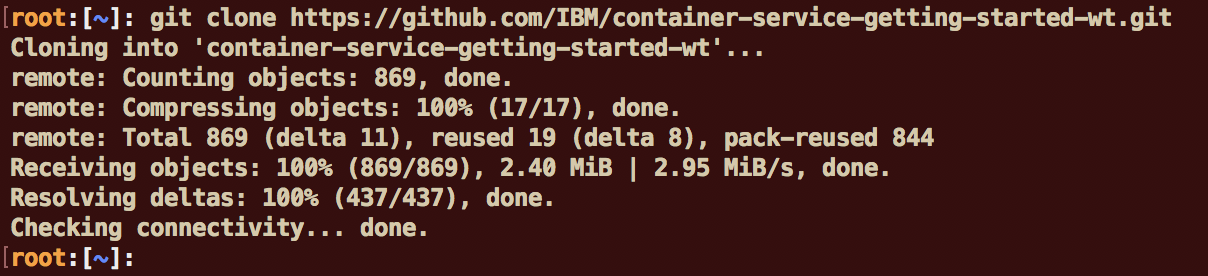
git clone https://github.com/IBM/container-service-getting-started-wt.git
3. Build a Docker image
Build the image locally and tag it with the name that you want to use on the kubernetes cluster. The tag includes the namespace name of <namespace> in the cluster. The tag also targets the master node of the cluster, which manages the job of placing it on one or more worker nodes. This is because of the alias you created in the previous step, with the cluster name linked to the master node name. Tagging the image this way tells Docker where to push the image in a later step. Use lowercase alphanumeric characters or underscores only in the image name. Don’t forget the period (.) at the end of the command. The period tells Docker to look inside the current directory for the Dockerfile and build artifacts to build the image.
cd "container-service-getting-started-wt/Lab 1"
docker build -t us.icr.io/<namespace>/hello1 .
Output is:
$ docker build -t us.icr.io/tufihreg/hello1 .
Sending build context to Docker daemon  15.36kB
Step 1/6 : FROM node:9.4.0-alpine
 ---> b5f94997f35f
Step 2/6 : COPY app.js .
 ---> Using cache
 ---> 1656019fb44c
Step 3/6 : COPY package.json .
 ---> Using cache
 ---> 25073c1f4ffc
Step 4/6 : RUN npm install &&    apk update &&    apk upgrade
 ---> Using cache
 ---> 9d9be9bd3e04
Step 5/6 : EXPOSE  8080
 ---> Using cache
 ---> 0d2c2bddc163
Step 6/6 : CMD node app.js
 ---> Using cache
 ---> 51c706fdc0c1
Successfully built 51c706fdc0c1
Successfully tagged us.icr.io/tufihreg/hello1:latest
To see the image, use the following command:
docker images us.icr.io/<namespace>/hello1:latest
Example:
# docker images us.icr.io/tufihreg/hello1:latest
REPOSITORY                  TAG                 IMAGE ID            CREATED              SIZE
us.icr.io/tufihreg/hello1   latest              64f2c2c3560f        About a minute ago   76.1MB
4. push the image to the registry.
Push your image into the private registry :
docker push us.icr.io/<namespace>/hello1:latest
Your output should look like this.
# docker push us.icr.io/tufihreg/hello1
The push refers to repository [us.icr.io/tufihreg/hello1]
618c96e10396: Pushed
d4f965d04cac: Pushed
bcefe6f9fcc4: Pushed
0804854a4553: Pushed
6bd4a62f5178: Pushed
9dfa40a0da3b: Pushed
latest: digest: sha256:467072ed2265efc3340cbf9ae25a16df205fb180d92e302161610ba70a60b690 size: 1576
IMPORTANT : be sure that all the layers have been pushed, wait for the digest line at the end.
5. Open the Kubernetes Console
Go to your IBM Cloud Console and click on the IBM Cloud icon on the top left part of the screen:
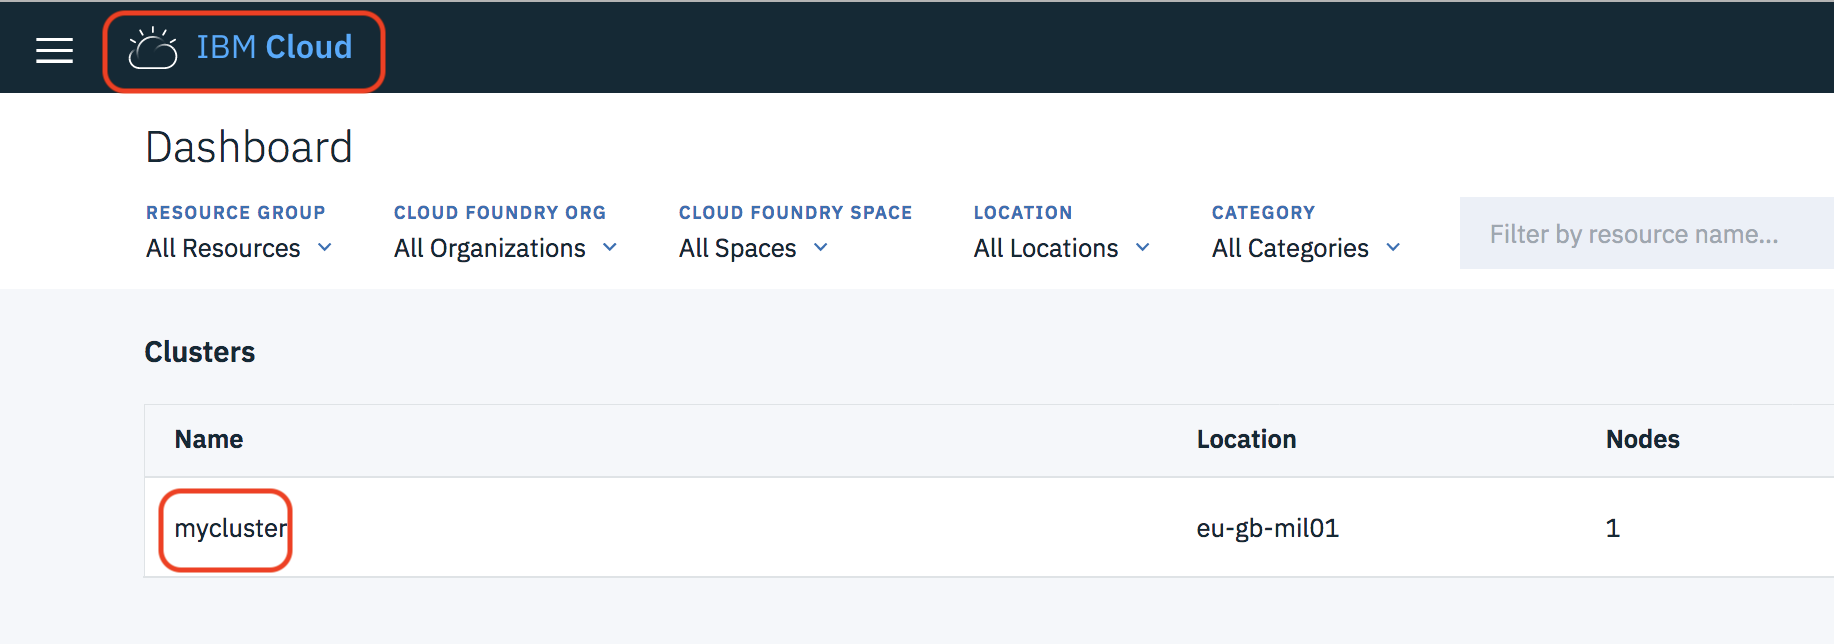
Then select “mycluster” to see the Kubernetes Cluster details.
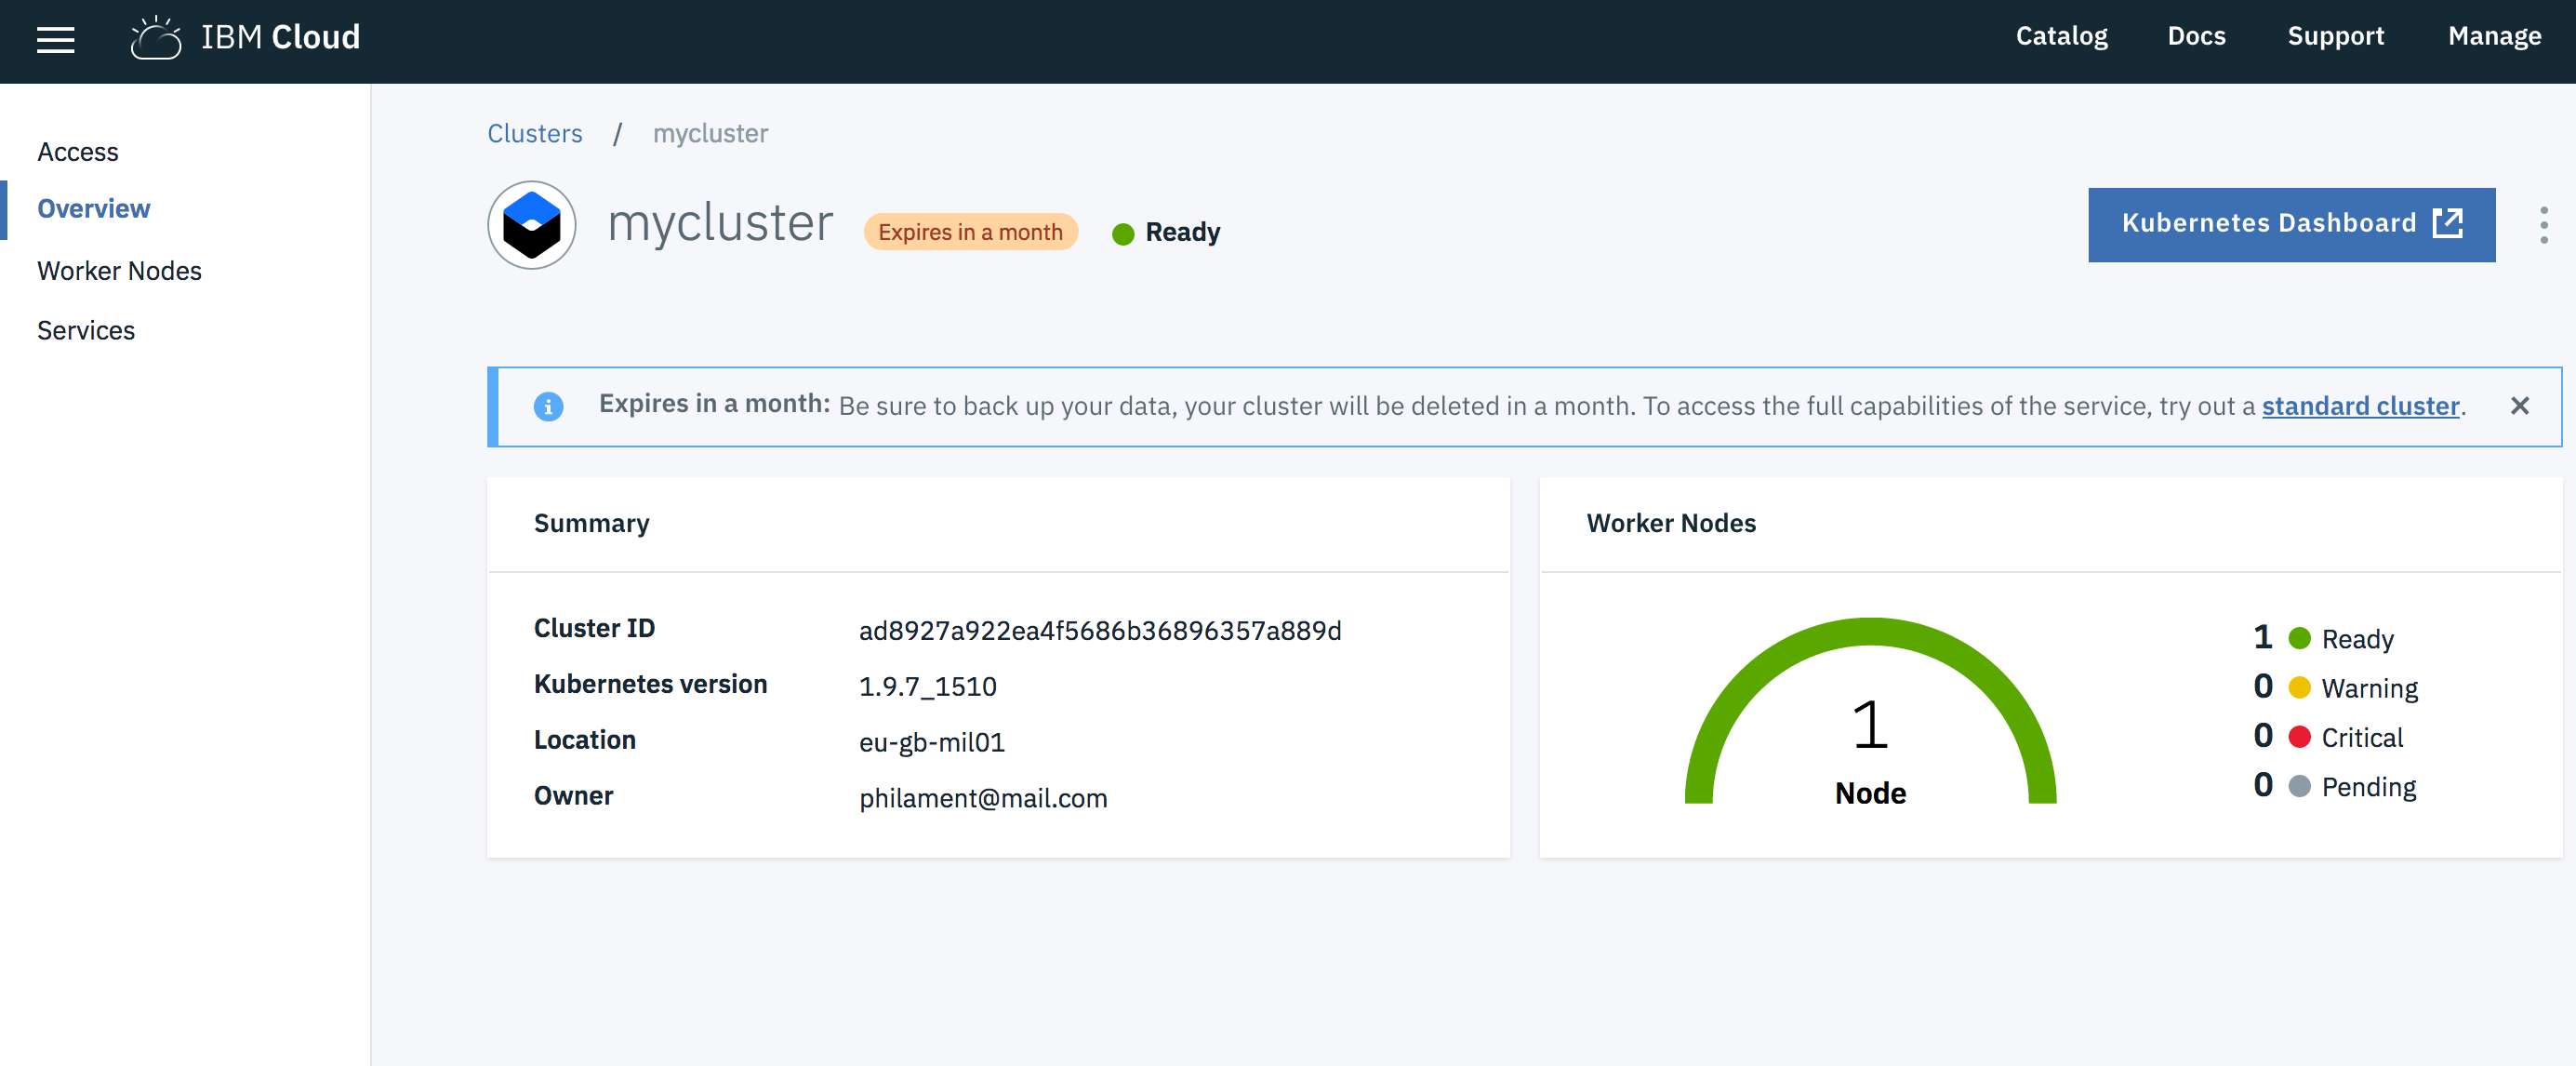
Now go to the Worker Nodes section (on the left pane) and take a note of the public IP of that worker node :
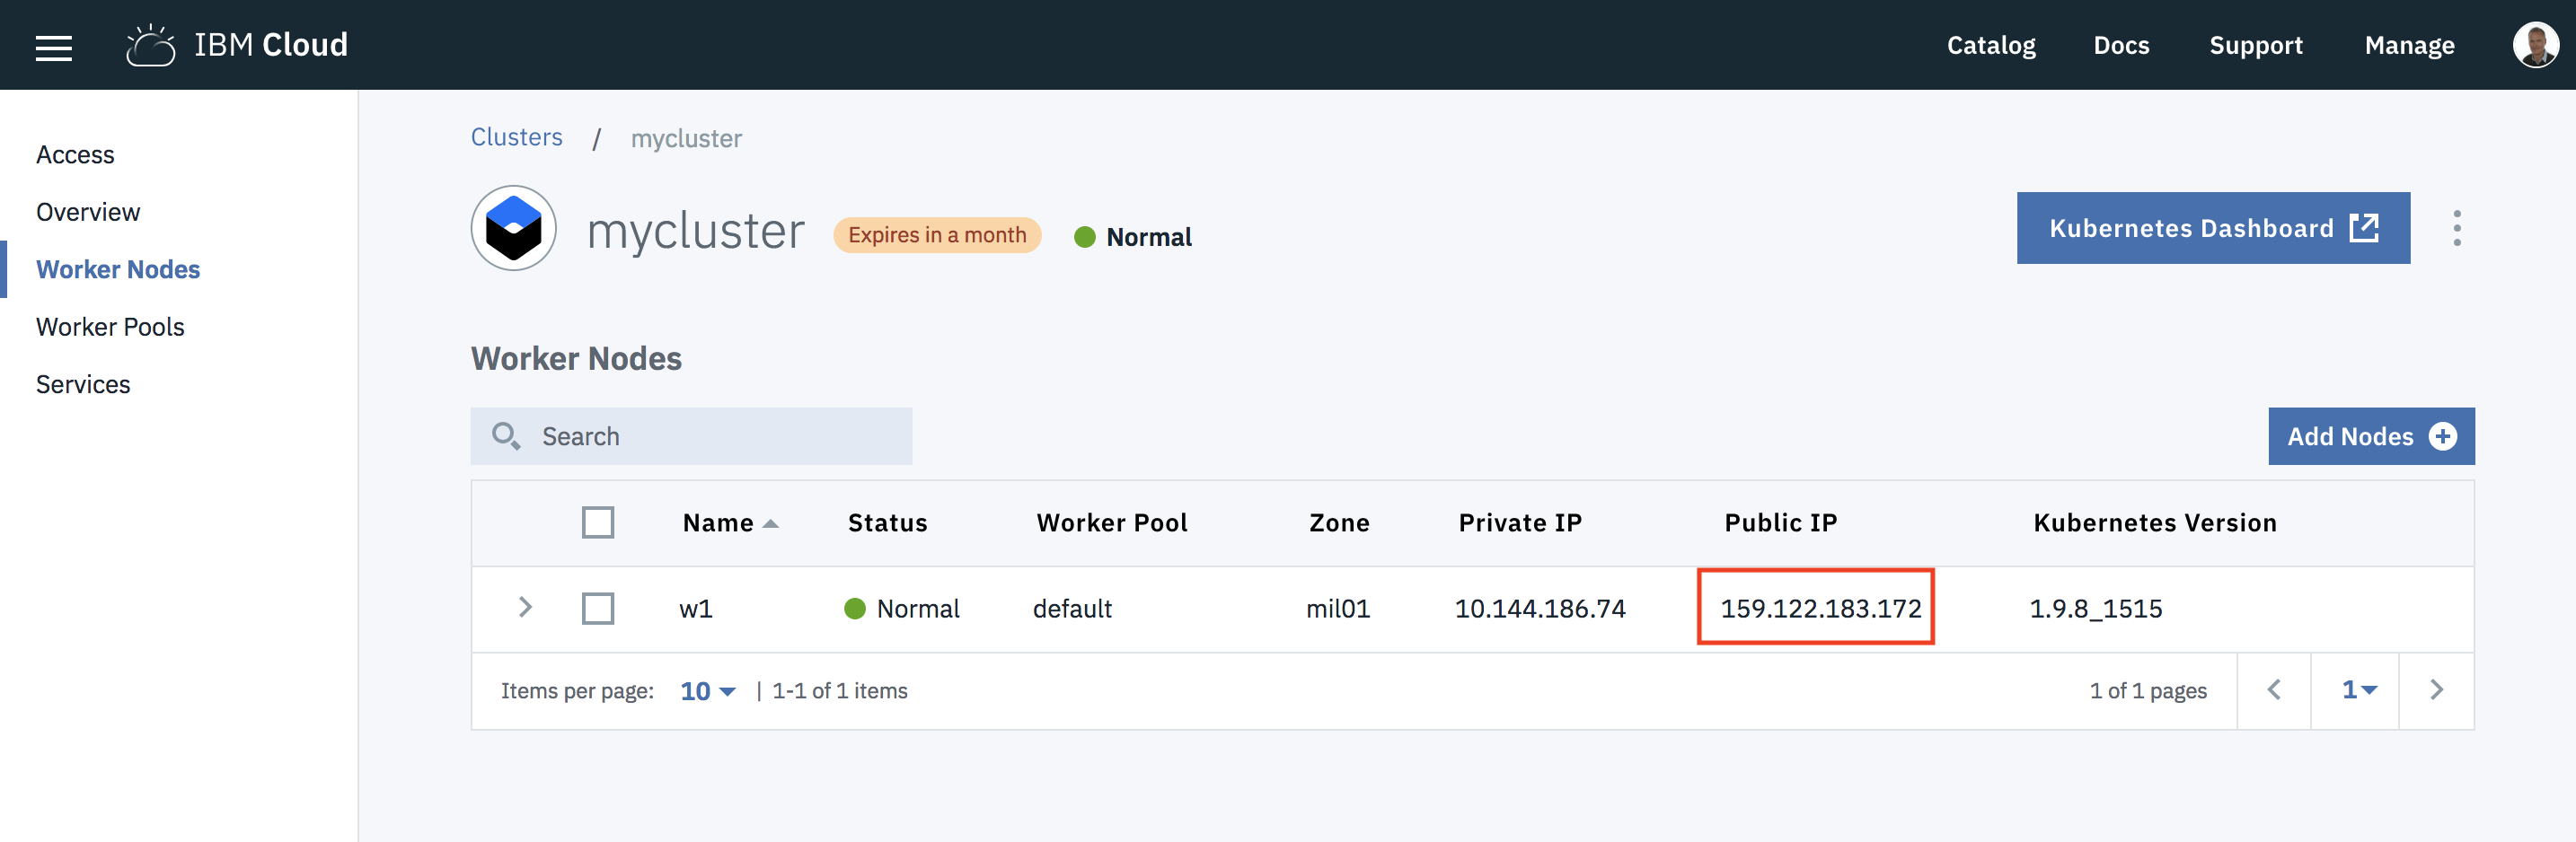
On the right part of the screen, click the blue button : Kubernetes Dashboard
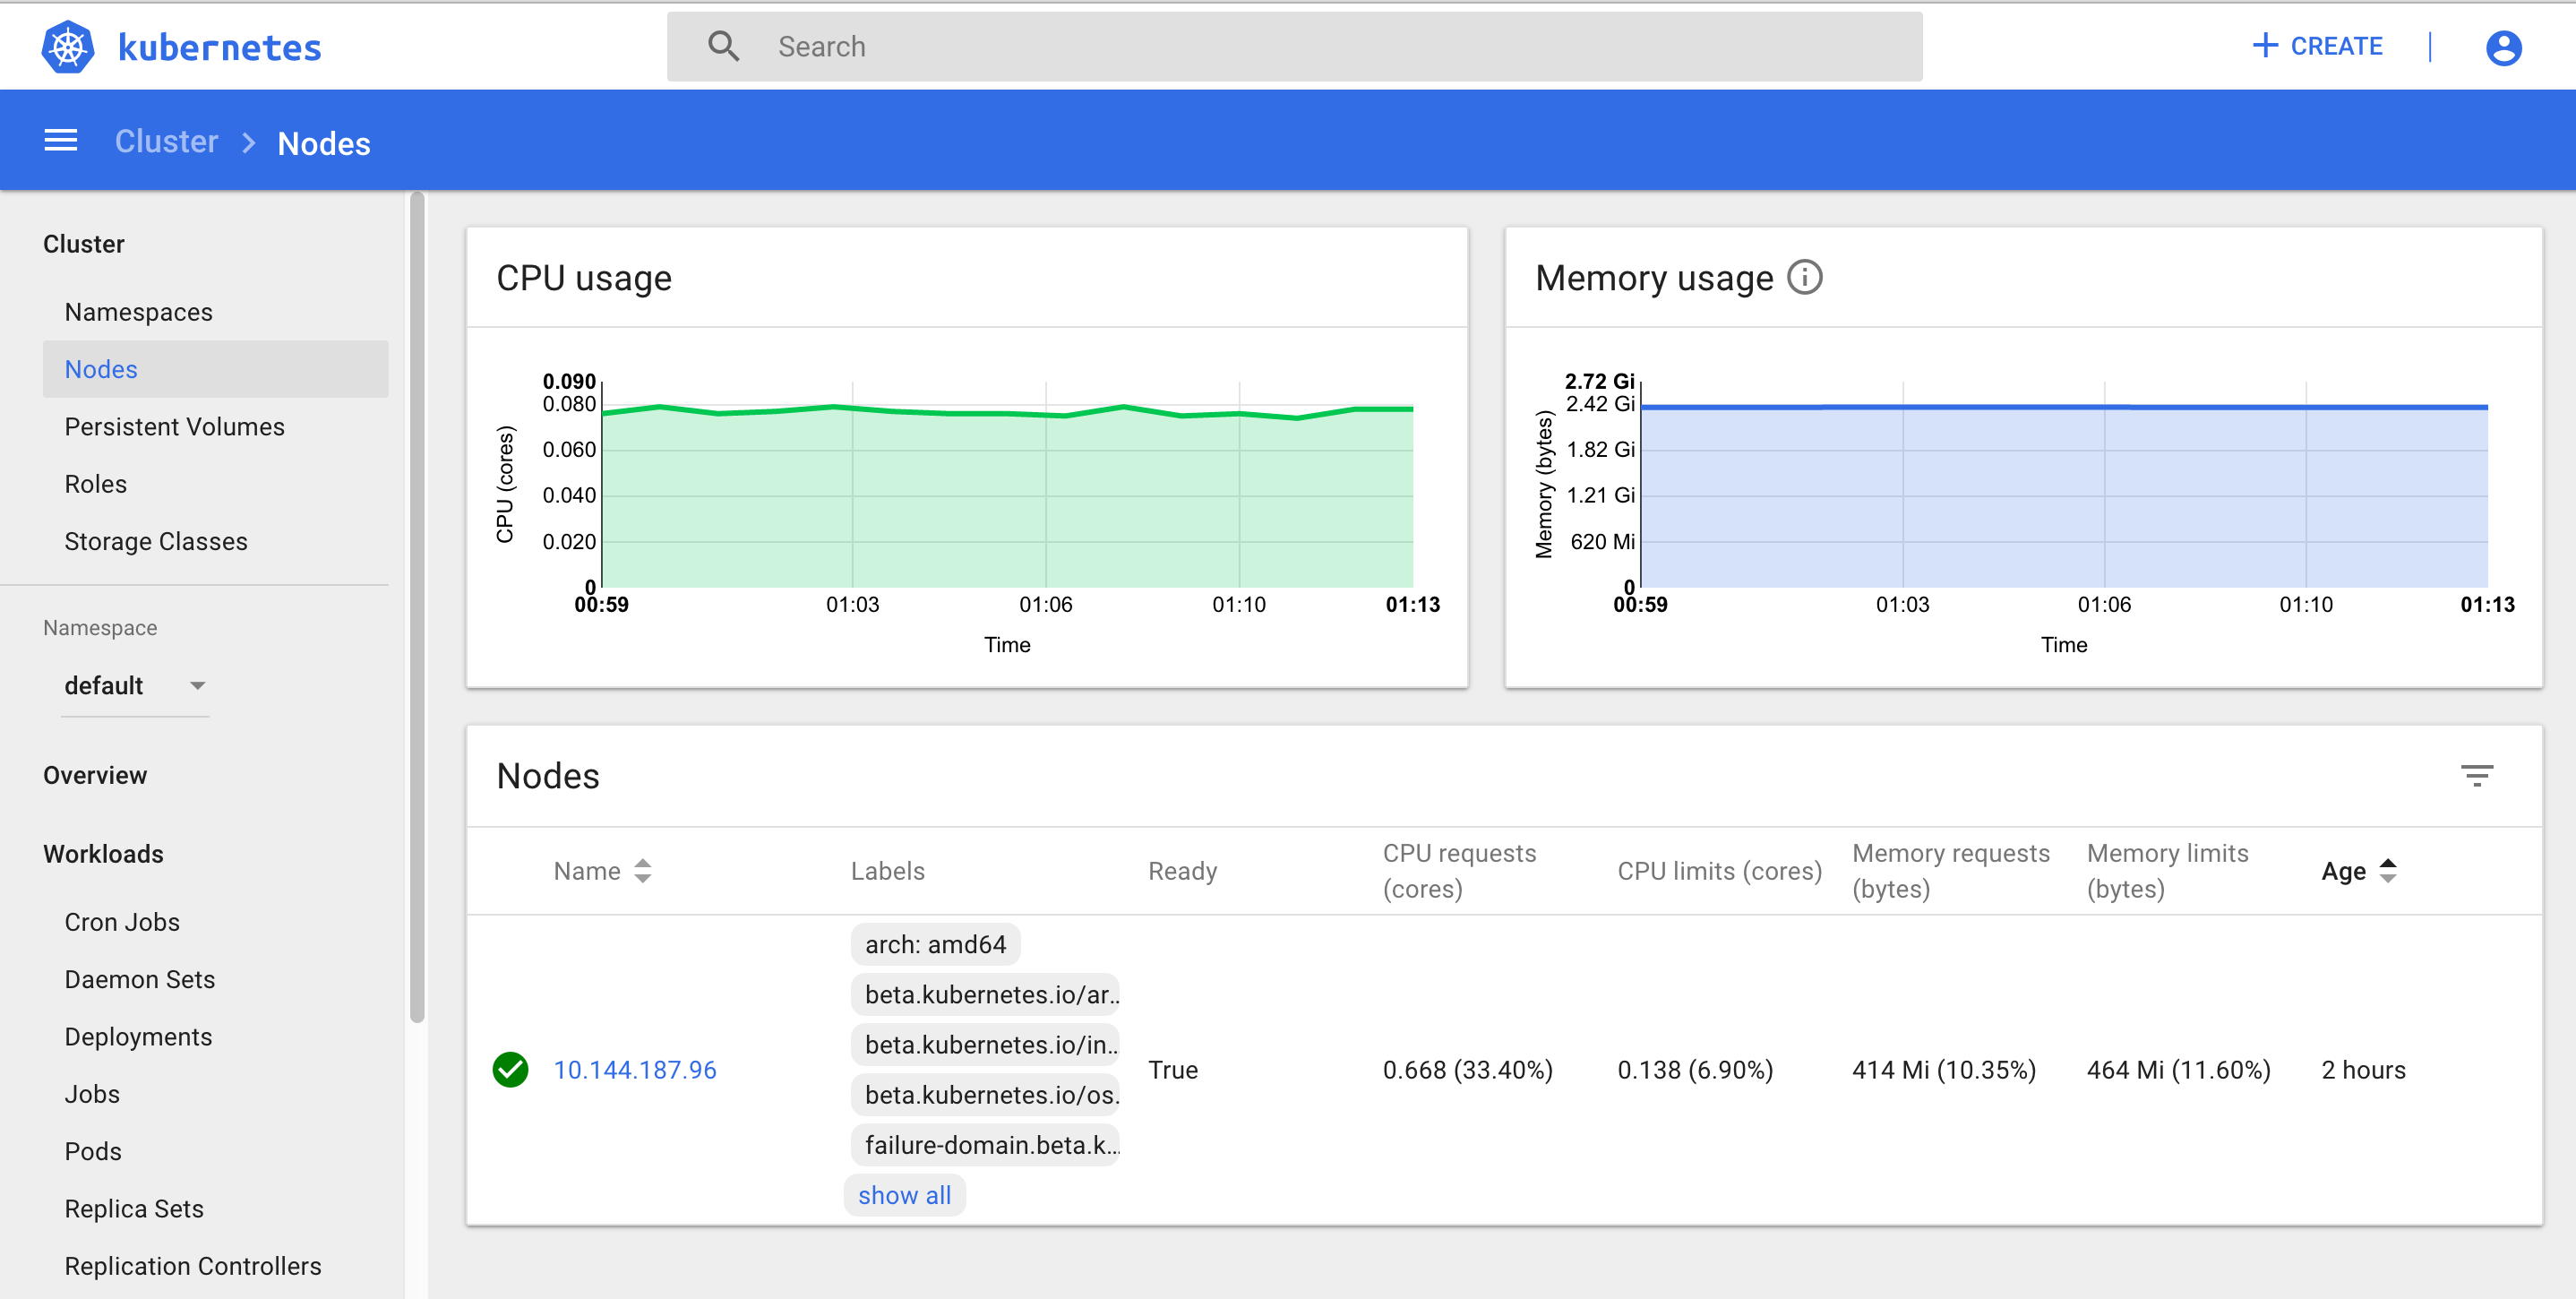
You can look around in the dashboard to see all the different resources (pods, nodes …) or the workloads (deployments, services …).
6. Run a deployment
Use your image to create a kubernetes deployment with the following command.
kubectl run hello1-deployment --image=us.icr.io/<namespace>/hello1
Output is :
# kubectl run hello1-deployment --image=us.icr.io/tufihreg/hello1
kubectl run --generator=deployment/apps.v1 is DEPRECATED and will be removed in a future version. Use kubectl run --generator=run-pod/v1 or kubectl create instead.
deployment.apps/hello1-deployment created
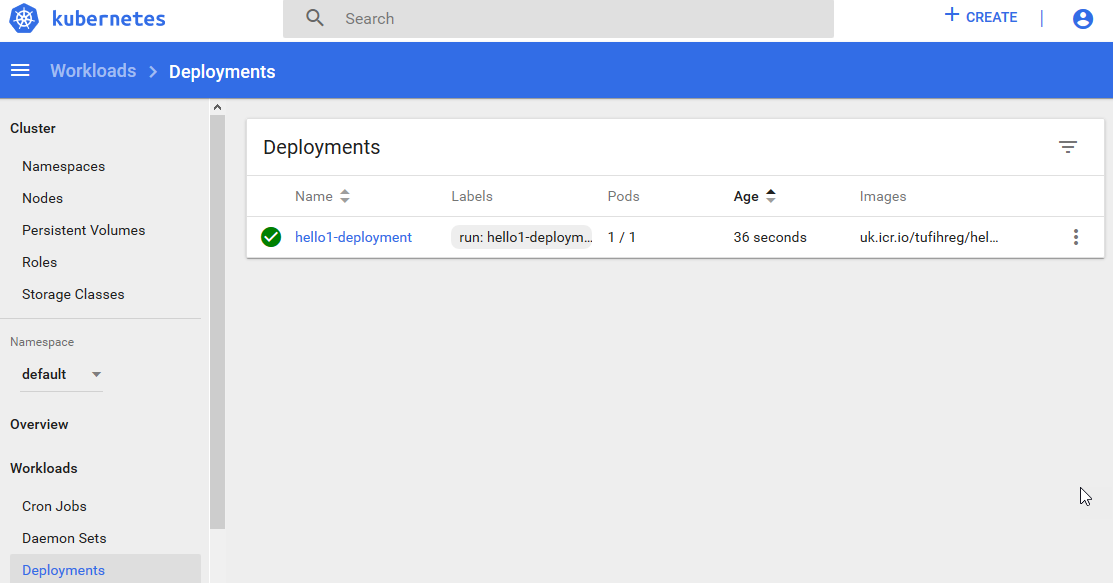
You can also look at the dashboard to see the deployment:
7. Create a service
Create a service to access your running container using the following command.
kubectl expose deployment/hello1-deployment --type=NodePort --port=8080 --name=hello1-service --target-port=8080
Your output should be:
$ kubectl expose deployment/hello1-deployment --type=NodePort --port=8080 --name=hello1-service --target-port=8080
service "hello1-service" exposed
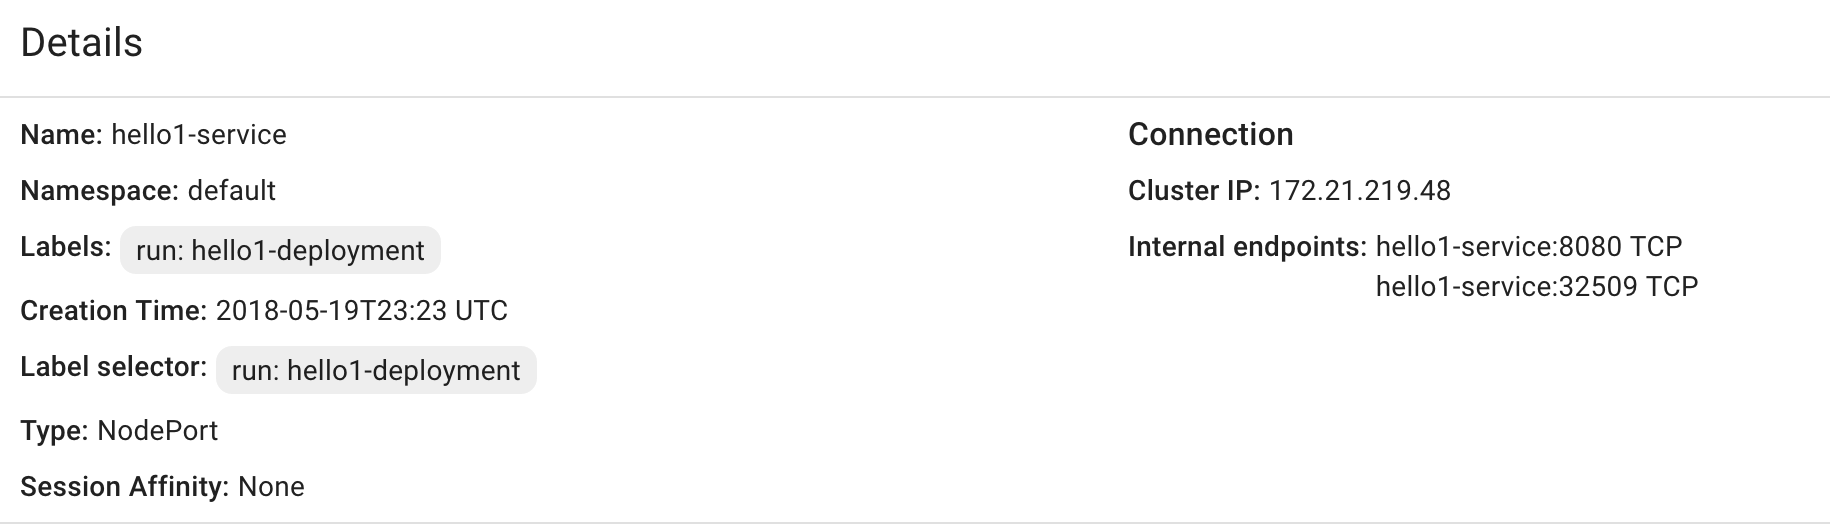
And you can also go to the dashboard :

8. NodePort type
With the NodePort type of service, the kubernetes cluster creates a 5-digit port number to access the running container through the service.
The service is accessed through the IP address of the proxy node with the NodePort port number. To discover the NodePort number that has been assigned, use the following command.
kubectl describe service hello1-service
Your output should look like this.
$ kubectl describe service hello1-service
Name:                     hello1-service
Namespace:                default
Labels:                   run=hello1-deployment
Annotations:              <none>
Selector:                 run=hello1-deployment
Type:                     NodePort
IP:                       172.21.219.48
Port:                     <unset>  8080/TCP
TargetPort:               8080/TCP
NodePort:                 <unset>  32509/TCP
Endpoints:                172.30.192.135:8080
Session Affinity:         None
External Traffic Policy:  Cluster
Events:                   <none>
Or look at the dashboard:
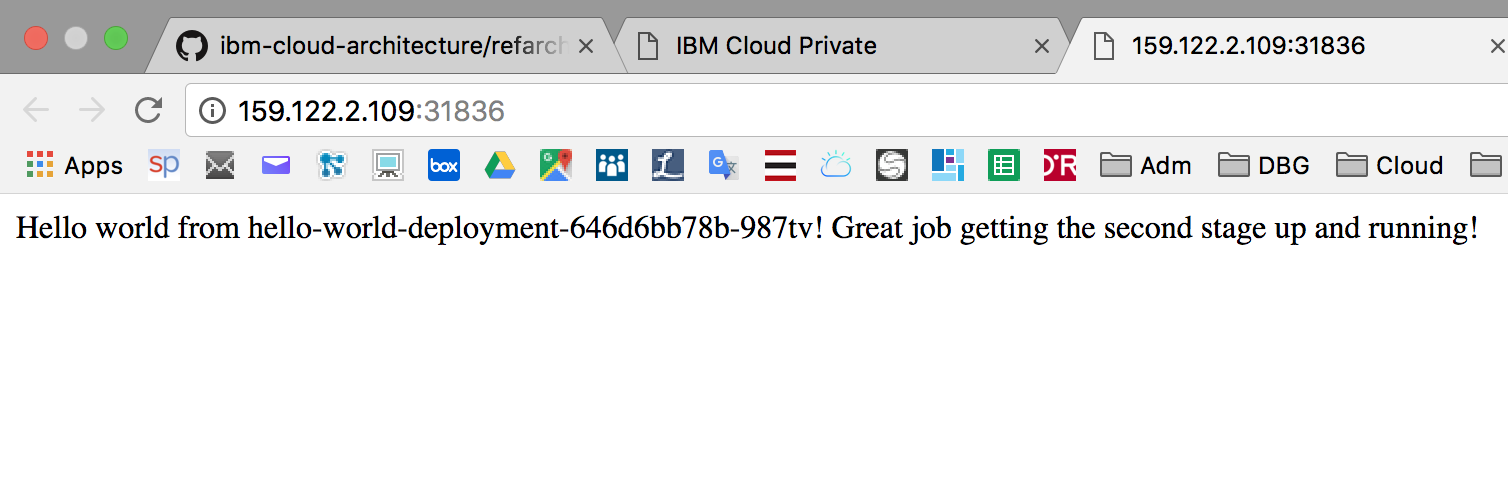
9. NodePort number 32509
Yours may be different. Open a Firefox browser window or tab and go to the URL of your worker node with your NodePort number, such as http://159.122.181.117:32509. Your output should look like this.

Note : To retreive external IP, run : kubectl get nodes -o wide
# kubectl get nodes -o wide

NAME             STATUS   ROLES    AGE   VERSION       INTERNAL-IP      EXTERNAL-IP       OS-IMAGE             KERNEL-VERSION      CONTAINER-RUNTIME
10.144.194.179   Ready    <none>   15h   v1.13.7+IKS   10.144.194.179   159.122.175.220   Ubuntu 16.04.6 LTS   4.4.0-150-generic   containerd://1.2.6
10. Application troubleshooting
You can obtain text-based information on all the resources running in your cluster using the following command if you want to debug your application when running
kubectl get pods
Results:
# kubectl get pods
NAME                                      READY     STATUS    RESTARTS   AGE
hello-world-deployment-67b694c76f-hvg9k   1/1       Running   0          11m
If the POD is running then look at the log (change the pod name with the one shown in latest command):
kubectl logs hello-world-deployment-67b694c76f-hvg9k
Results:
# kubectl logs hello-world-deployment-67b694c76f-hvg9k
Sample app is listening on port 8080.
You can see the output of your nodeJS application.
You can also go inside your container:
kubectl exec -it hello-world-deployment-67b694c76f-hvg9k /bin/sh
Results:
# kubectl exec -it hello-world-deployment-67b694c76f-hvg9k /bin/sh
/ # ps
PID   USER     TIME   COMMAND
    1 root       0:00 /bin/sh -c node app.js
    7 root       0:00 node app.js
   19 root       0:00 /bin/sh
   25 root       0:00 ps
/ #
/ # ls -l
total 96
-rw-r--r--    1 root     root           325 Nov 30 15:30 app.js
drwxr-xr-x    1 root     root          4096 Nov 30 15:31 bin
drwxr-xr-x    5 root     root           360 Nov 30 15:37 dev
drwxr-xr-x    1 root     root          4096 Nov 30 15:37 etc
drwxr-xr-x    1 root     root          4096 Jan 11  2018 home
drwxr-xr-x    1 root     root          4096 Nov 30 15:31 lib
drwxr-xr-x    5 root     root          4096 Jan  9  2018 media
drwxr-xr-x    2 root     root          4096 Jan  9  2018 mnt
drwxr-xr-x   80 root     root          4096 Nov 30 15:31 node_modules
drwxr-xr-x    3 root     root          4096 Jan 11  2018 opt
-rw-r--r--    1 root     root         25023 Nov 30 15:31 package-lock.json
-rw-r--r--    1 root     root           183 Nov 30 15:30 package.json
dr-xr-xr-x  583 root     root             0 Nov 30 15:37 proc
drwx------    1 root     root          4096 Nov 30 15:59 root
drwxr-xr-x    2 root     root          4096 Jan  9  2018 run
drwxr-xr-x    1 root     root          4096 Nov 30 15:31 sbin
drwxr-xr-x    2 root     root          4096 Jan  9  2018 srv
dr-xr-xr-x   13 root     root             0 Nov 30 15:03 sys
drwxrwxrwt    1 root     root          4096 Jan 11  2018 tmp
drwxr-xr-x    1 root     root          4096 Jan 11  2018 usr
drwxr-xr-x    1 root     root          4096 Jan  9  2018 var
/ #
You can use some commands like: ps, ls, cat … and you can also install commands that are not there (using apt-get install for example).
Dont forget to exit
# exit
Congratulations ! You have deployed your first app to the IBM Cloud kubernetes cluster.
Task 5 : Scaling Apps with Kubernetes
In this lab, understand how to update the number of replicas a deployment has and how to safely roll out an update on Kubernetes. Learn, also, how to perform a simple health check.
For this lab, you need a running deployment with a single replica. First, we cleaned up the running deployment.
1. Clean up the current deployment
To do so, use the following commands :
- To remove the deployment, use:
kubectl delete deployment hello1-deployment
- To remove the service, use:
kubectl delete service hello1-service
2. Run a clean deployment
To do so, use the following commands :
kubectl run hello1-deployment --image=us.icr.io/<namespace>/hello1
3. Scale the application
A replica is how Kubernetes accomplishes scaling out a deployment. A replica is a copy of a pod that already contains a running service. By having multiple replicas of a pod, you can ensure your deployment has the available resources to handle increasing load on your application.
kubectl provides a scale subcommand to change the size of an existing deployment. Let’s us it to go from our single running instance to 10 instances.
kubectl scale --replicas=10 deployment hello1-deployment
Here is the result:
$ kubectl scale --replicas=10 deployment hello1-deployment
deployment "hello1-deployment" scaled
Kubernetes will now act according to the desired state model to try and make true, the condition of 10 replicas. It will do this by starting new pods with the same configuration.
To see your changes being rolled out, you can run:
kubectl rollout status deployment/hello1-deployment
The rollout might occur so quickly that the following messages might not display:
$ kubectl rollout status deployment/hello1-deployment
Waiting for rollout to finish: 1 of 10 updated replicas are available...
Waiting for rollout to finish: 2 of 10 updated replicas are available...
Waiting for rollout to finish: 3 of 10 updated replicas are available...
Waiting for rollout to finish: 4 of 10 updated replicas are available...
Waiting for rollout to finish: 5 of 10 updated replicas are available...
Waiting for rollout to finish: 6 of 10 updated replicas are available...
Waiting for rollout to finish: 7 of 10 updated replicas are available...
Waiting for rollout to finish: 8 of 10 updated replicas are available...
Waiting for rollout to finish: 9 of 10 updated replicas are available...
deployment "hello1-deployment" successfully rolled out
Once the rollout has finished, ensure your pods are running by using:
kubectl get pods
You should see output listing 10 replicas of your deployment:
Results :
$ kubectl get pods
NAME                                 READY     STATUS    RESTARTS   AGE
hello1-deployment-864cd87c7f-675sr   1/1       Running   0          5m
hello1-deployment-864cd87c7f-6wxkp   1/1       Running   0          3m
hello1-deployment-864cd87c7f-8fb7b   1/1       Running   0          3m
hello1-deployment-864cd87c7f-fn5t8   1/1       Running   0          3m
hello1-deployment-864cd87c7f-ksvgm   1/1       Running   0          3m
hello1-deployment-864cd87c7f-l2x97   1/1       Running   0          3m
hello1-deployment-864cd87c7f-mb5fw   1/1       Running   0          3m
hello1-deployment-864cd87c7f-nwzr5   1/1       Running   0          3m
hello1-deployment-864cd87c7f-vfnbl   1/1       Running   0          3m
hello1-deployment-864cd87c7f-w7p6m   1/1       Running   0          3m
4. Rollout an update to the application
Kubernetes allows you to use a rollout to update an app deployment with a new Docker image. This allows you to easily update the running image and also allows you to easily undo a rollout, if a problem is discovered after deployment.
In the previous lab, we created an image with a 1 tag. Let’s make a version of the image that includes new content and use a 2 tag. This lab also contains a Dockerfile. Let’s build and push it up to our image registry.
If you are in “Lab 1” directory, you need to go to “Lab 2” directory:
cd "container-service-getting-started-wt/Lab 2"
Build a new version (2) of that application:
docker build -t us.icr.io/<namespace>/hello1:2 .
Then push the new version into the registry:
docker push us.icr.io/<namespace>/hello1:2
Using kubectl, you can now update your deployment to use the latest image. kubectl allows you to change details about existing resources with the set subcommand. We can use it to change the image being used.
kubectl set image deployment/hello1-deployment hello1-deployment=us.icr.io/<namespace>/hello1:2
Note that a pod could have multiple containers, in which case each container will have its own name. Multiple containers can be updated at the same time.
Run kubectl rollout status deployment/hello-world or kubectl get replicasets to check the status of the rollout. The rollout might occur so quickly that the following messages might not display:
kubectl rollout status deployment/hello1-deployment
$ kubectl rollout status deployment/hello1-deployment
Waiting for rollout to finish: 2 out of 10 new replicas have been updated...
Waiting for rollout to finish: 3 out of 10 new replicas have been updated...
Waiting for rollout to finish: 3 out of 10 new replicas have been updated...
Waiting for rollout to finish: 3 out of 10 new replicas have been updated...
Waiting for rollout to finish: 4 out of 10 new replicas have been updated...
Waiting for rollout to finish: 4 out of 10 new replicas have been updated...
Waiting for rollout to finish: 4 out of 10 new replicas have been updated...
Waiting for rollout to finish: 4 out of 10 new replicas have been updated...
Waiting for rollout to finish: 4 out of 10 new replicas have been updated...
Waiting for rollout to finish: 5 out of 10 new replicas have been updated...
Waiting for rollout to finish: 5 out of 10 new replicas have been updated...
Waiting for rollout to finish: 5 out of 10 new replicas have been updated...
Waiting for rollout to finish: 6 out of 10 new replicas have been updated...
Waiting for rollout to finish: 6 out of 10 new replicas have been updated...
Waiting for rollout to finish: 6 out of 10 new replicas have been updated...
Waiting for rollout to finish: 7 out of 10 new replicas have been updated...
Waiting for rollout to finish: 7 out of 10 new replicas have been updated...
Waiting for rollout to finish: 7 out of 10 new replicas have been updated...
Waiting for rollout to finish: 7 out of 10 new replicas have been updated...
Waiting for rollout to finish: 8 out of 10 new replicas have been updated...
Waiting for rollout to finish: 8 out of 10 new replicas have been updated...
Waiting for rollout to finish: 8 out of 10 new replicas have been updated...
Waiting for rollout to finish: 8 out of 10 new replicas have been updated...
Waiting for rollout to finish: 9 out of 10 new replicas have been updated...
Waiting for rollout to finish: 9 out of 10 new replicas have been updated...
Waiting for rollout to finish: 9 out of 10 new replicas have been updated...
Waiting for rollout to finish: 1 old replicas are pending termination...
Waiting for rollout to finish: 1 old replicas are pending termination...
Waiting for rollout to finish: 1 old replicas are pending termination...
Waiting for rollout to finish: 9 of 10 updated replicas are available...
Waiting for rollout to finish: 9 of 10 updated replicas are available...
Waiting for rollout to finish: 9 of 10 updated replicas are available...
deployment "hello1" successfully rolled out
Or with Kubernetes Dashboard :

Finally, use that command to see the result:
kubectl get replicasets
Results:
$ kubectl get replicasets
NAME                           DESIRED   CURRENT   READY     AGE
hello1-deployment-864cd87c7f   0         0         0         23m
hello1-deployment-d7cb4bfcf    10        10        10        2m
Create a new service:
kubectl expose deployment/hello1-deployment --type=NodePort --port=8080 --name=hello1-service --target-port=8080
kubectl describe service hello1-service
Collect the NodePort and test your new code :
Conclusion
You have learnt how to create a Kubernetes cluster and see how to configure all the necessary tools (CLI, connection) to manage a cluster and the kubernetes resources (PODs, Services). And you have deployed and scaled an application in that kubernetes cluster !
End of the lab
APPENDIX : Getting cluster configuration on windows
On windows, you will get the following result :
PS C:\Data\iksdemo> ibmcloud ks cluster-config iksdemocluster
OK
The configuration for iksdemocluster was downloaded successfully.

Export environment variables to start using Kubernetes.

SET KUBECONFIG=C:\Users\FRANCKDescollonges\.bluemix\plugins\container-service\clusters\iksdemocluster\kube-config-dal10-iksdemocluster.yml
With “cmd” shell, use SET command like described in the output of the cluster-config command :
SET KUBECONFIG=C:\Users\FRANCKDescollonges\.bluemix\plugins\container-service\clusters\iksdemocluster\kube-config-dal10-iksdemocluster.yml
On windows, with powershell, replace SET KUBECONFIG with $Env:KUBECONFIG (watch out spaces and quotes):
$Env:KUBECONFIG = "C:\Users\FRANCKDescollonges\.bluemix\plugins\container-service\clusters\iksdemocluster\kube-config-dal10-iksdemocluster.yml"